

By Larry Walton
Seeing the rebirth of the American muscle car has been a cool thing, especially because the manufacturers picked up some important style cues from back in the day. When Chevy styled the new Camaro after the 1968 version, they really caught my attention, and Ford did a great job on the new Mustang. Best of all these machines are real performers that can even go around a corner.
The Mopar guys also got their wish list in duplicate with the new Dodge Charger and Dodge Challenger. Almost synonymous with American muscle is the drive to make them faster, and the new technology built into these machines makes them well suited for aftermarket upgrades.
When Performance expert James McCoy at Garage 808 talks to a client about what they want to achieve with their new-generation muscle car, his first questions is, “How much do you want to spend?” Entry level modifications on a stock car cost a couple of thousand dollars to get the first tier of bolt-ons, starting with aftermarket intake, exhaust and a tune (including the necessary software, which can be used in conjunction with all of the future mods as you build the car). On one of the new-gen muscle cars these initial mods should get you about 25 additional wheel horsepower as measured on a chassis dyno.
The next step up would be a super charger, which is more common for the muscle car crowd than turbo chargers. The aftermarket is building some pretty cool super charger kits, which are relatively simple installations. This would get you an additional 75 horsepower for a total gain of 100hp over stock.
If you are going to do some of the work yourself, it’s a good idea to start with a high-flow intake kit. You won’t see significant power gains with this first upgrade, but it’s the necessary first step that makes power gains possible for further projects.
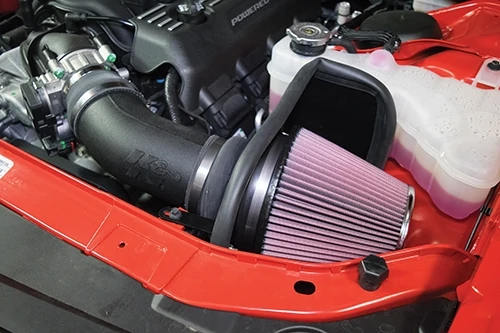
Here’s how the guys at Garage 808 installed K&N’s AirCharger High-Flow Intake Kit on one of the coolest new muscle cars, the 2015 Dodge Challenger.
The stock intake box is mostly enclosed, which is different from the K&N kit that uses a heat shield to create a partition in the corner of the engine bay.
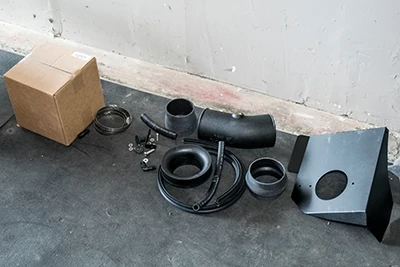
The K&N Kit requires some assembly, but it comes with everything needed for installation. The cone-style air filter is in the box.
After disconnecting the ground cable from the negative battery post, our mechanic Tim disconnected the temperature wires.
He then removed the driver side ignition coil cover, which pops off by lifting.
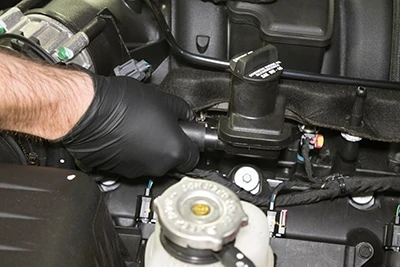
Next step is to disconnect the crank case vent hose from the valve cover.
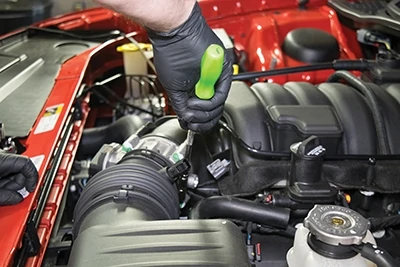
Loosen the clamp securing the intake tube to the throttle body.
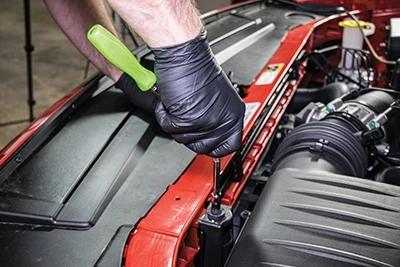
Remove the bolt that secures the air box to the core support.

The intake boot pulls away from the throttle body.
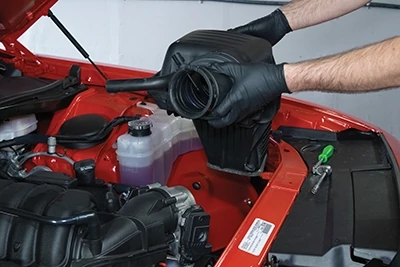
Lift the air box out of the corner of the engine bay.
Before storing the stock intake box, Tim removed the air temperature sensor so he could use it on the new unit.
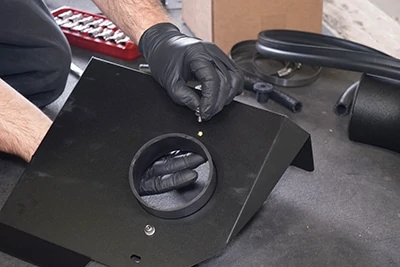
Install the filter adapter into the heat shield.
The L-bracket and spacer attaches onto the heat shield.
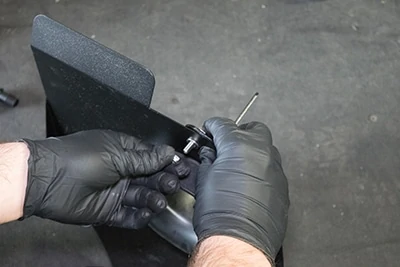
Install the rubber insert onto the heat shield. The insert aligns with the stock mounting point.
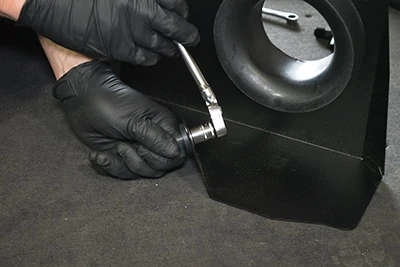
Install the edge trim around the perimeter of the heat shield and cut off the excess with aviation snips.
The included hump hose installs onto the filter adapter. This hose section attaches the intake tube to the filter adapter.
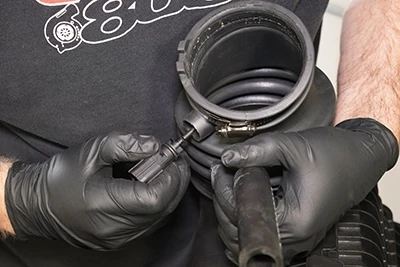
Install the stock air temperature sensor into the air intake tube by first installing the provided grommet in the sensor opening.
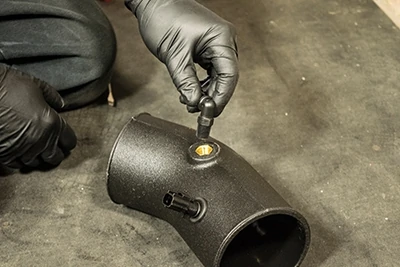
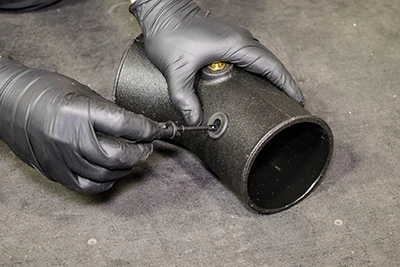
Thread the 90-degree vent fitting into the NPT fitting in the tube.
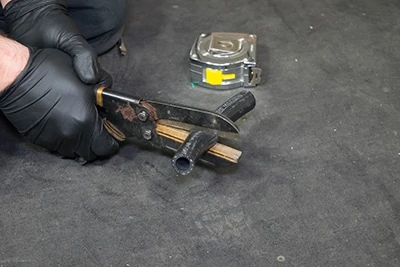
Tim cut the 1/2-in. silicone vent hose to 9-in. long and cut the 5/8-in. vent line to 2-1/2 inches long, then connected them together with provided hose mender.
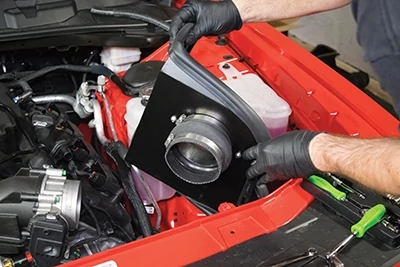
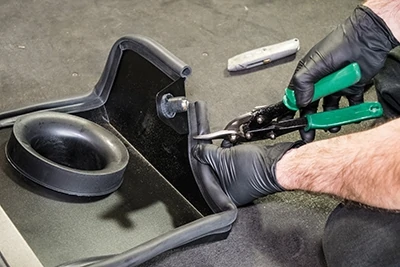
The heat shield installs by inserting the rubber mount into the air-box mounting hole of the inner fender.
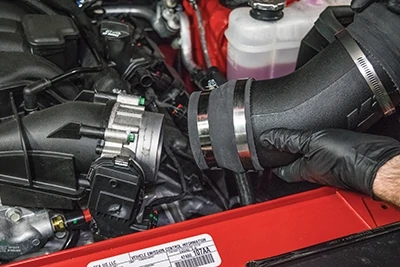
After attaching the step hose to the intake tube, position the tube between the throttle body and the heat shield while sliding on the hump hose at the filter end and the step hose at the throttle-body end.
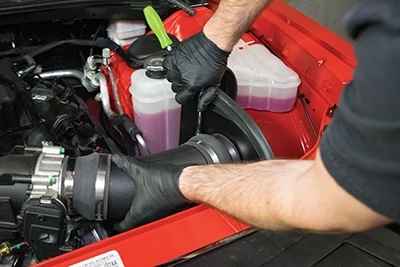
Arrange the tube so the logo faces the core support and the fittings are headed in the right direction, then tighten the hose clamps.
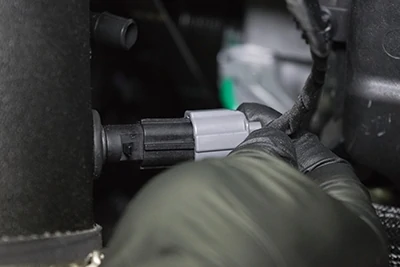
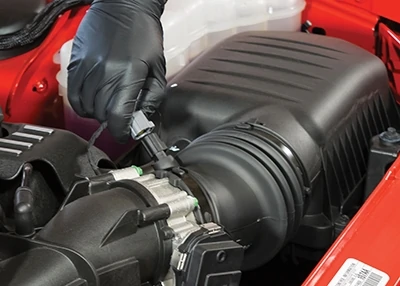
Snap the temperature sensor harness onto the connector.
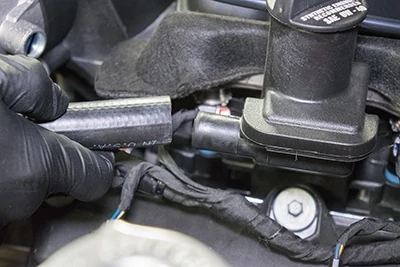
Install the vent hose between the intake tube and the valve cover port.
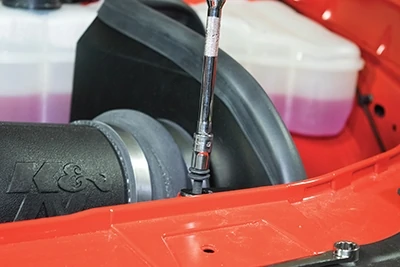
Fasten the heat shield bracket to the core support using the original air box bolt.
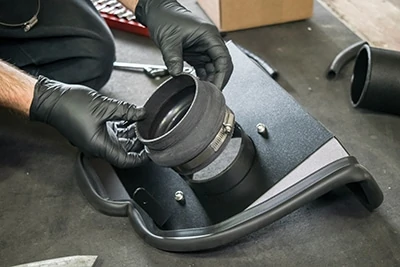
Attach the air filter to the filter adapter inside the heat shield and secure it with the provided hose clamp.

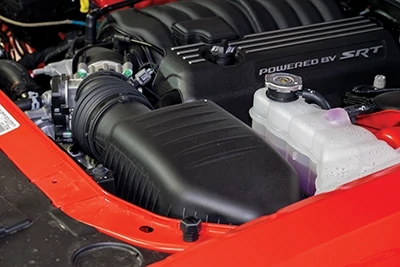
Tim reinstalled the coil cover and double-checked all hose clamps, hose connections and mounting bolts before starting the engine for the “after” dyno pulls. The new high-flow intake system fit the car perfectly. It looks cool in the engine bay as well.
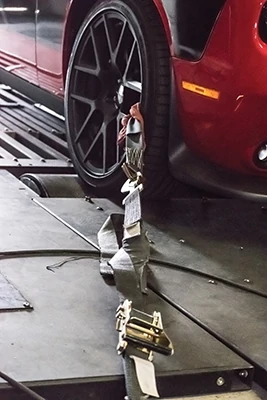
The iconic rear-wheel drive Challenger was strapped down on the Garage 808 dyno for before and after testing. We noted only slight gains in horsepower on the dyno with the new system, but the real gains would come later with the addition of the new exhaust and a tune.
