


Up Close with Glass Shower Stall Enclosures
By Rob Robillard
My brother, a master plumber, always says the shower is the heart of the bathroom. When the shower is bad, it can make you hate your bathroom.
The 5-by-7-ft. utilitarian master bathroom I grew up with is now history. Today’s trends—complete with radiant heat, unlimited on-demand hot water, high-end fixtures, furniture-grade vanities, stone work, music and walls of glass—have transformed bathrooms into private grottos where a homeowner can retreat to relax.
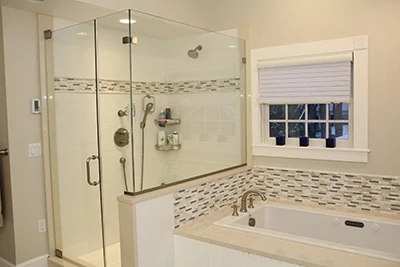
The trend these days is to remodel your bathroom into an oasis of relaxation, and the shower design, more specifically frameless glass shower enclosures, are a key driver in that trend.
A glass shower enclosure gives the bathroom a spacious, luxury spa-like look and feel, but all to often homeowners make a critical timing mistake. When designing the bathroom, homeowners often put off the glass shower enclosure decision until the end of the project, considering it a “finish trim” decision. Big mistake!
According to Greg Weyman, vice president of marketing for Basco Shower Enclosures, a leading shower enclosure manufacturer, “The tile, hardware and fixtures are where most people start and tend to spend the majority of the budget within the shower.”
If you want a glass shower, however, you should incorporate its inclusion from the outset of your remodeling plan.
Types of Glass Enclosures
Semi frame-less and frame-less glass shower enclosures have been around for a while and have always been associated with a timeless look of quality and classic design.
As a remodeler, most of the glass shower enclosure designs I deal with are custom made, which is not usually considered an easy DIY project.
Frame-less glass shower enclosures are made of tempered glass and come in varieties of finishes, styles, glass textures and patterns to satisfy most people’s aesthetic appetite. The glass doors are super heavy and require quality hinges and secure attachment in order to operate properly.
Planning
The process of planning, choosing and installing a custom glass enclosure can be an educational experience.
I truly believe that you get what you pay for, so don’t skimp on the products with features that will make your life easier and save you time. On my projects I use glass and fixtures from an Ohio-based company called Basco Shower Enclosures. Basco is an innovative leader in the shower enclosure industry, and has been around for more than 50 years. They are a family owned business, owned and operated, by the Rohde family in Mason, Ohio.
(In fact, Mr. Rohde, now in his nineties, still goes in to work to make an appearance.)
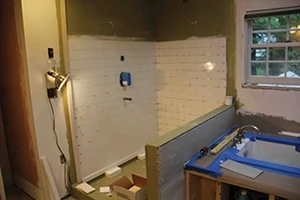
Design the Shower First
The best part of using a custom glass enclosure company is that you can create any type, size or shape shower you want, and then have the glass made to fit it. Custom glass enclosures can be installed with tolerances of 1/16 inch.
Professional glass installers will template the space you create and then have the glass cut perfectly to fit that space. This may include cutting tapered glass panels to fit to and accommodate walls and floors that are not level or plumb.
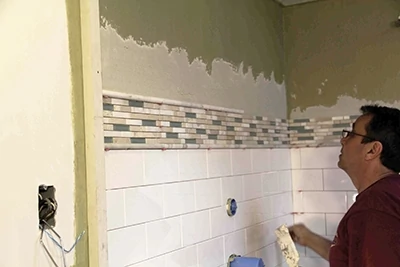
The installer needs to measure or create a template after the tile, marble or stone is set in place. It takes approximately three weeks to custom-make the glass and get it installed.

Many people hastily jump into a bath remodel project and unknowingly throw away money by not taking the proper steps to organize their project. Before you start remodeling your bathroom, take the time to communicate with your contractor and plumber about your intentions to use a custom glass enclosure.

Before I even break through a wall on any bath remodel slated for a glass enclosure, I call and consult my installer Mike Cook from BathWare Solutions out of Westbrook, Maine.
I’m a great remodeler, but Mike specializes in enclosures and has forgotten more than I know about his specialty trade! Check your ego at the door and consult the pros.
Planning Considerations
One thing that people do not realize is that adding tile, marble, granite and walls of glass adds hundreds of pounds to the “dead load” of the structure. A dead load is the weight of all the materials used in the construction of a home, and have an effect on all structural members of a house. This weight is a constant over the life of the structure, and has a big impact on the long-term deflection or creep of the framing members.
Careful planning at the time of remodeling may involve adding floor-framing support to carry the additional dead load.
Other things to consider are fastening these huge, several-hundred-pound panels of glass to walls and the door-hinge attachment.
Here are some considerations:
- Install solid blocking in the walls for the glass door and wall panels to be securely anchored. Install this blocking from the floor to the ceiling.
- Do the floor joists need reinforcing?
- Where will you enter the shower, and where should the showerhead go?
- Glass panels are installed to 1/16-in. tolerance, and the panels can be tapered to accommodate walls and floors that are not level or plumb.
- Glass panels cannot be cut to match a bow in the wall. Ensure that your walls are flat.
- Design your shower so your showerhead and body sprays do not splash directly onto a door or glass seam. Placement of these items is important to prevent leaks. (Note: Often the showerhead can be moved but not the door location, so share your plans with your contractor.)
- Pitch all thresholds into the shower for drainage.
- Pitch all half walls into the shower.
- Use solid surface thresholds. (Never use split tile thresholds.)
- Do you need an easily accessible shower with wheel-chair access?
- Schedule the glass installer to measure as soon as the tile or stone is set. Grouting is not necessary. Plan for installation three weeks later.
Choose the Shower Enclosure Frame
What does frameless and semi-frameless mean? Frameless will have minimal amount of framing around the door and panels for support. Semi-frameless may have framing around the entire opening but not around the actual door panel itself.
Semi-frameless and framed designs are available and are dependent on your design choice and décor. If you’re like me and prefer to see less aluminum and more glass, then you’ll want a frameless or semi-frameless enclosure.
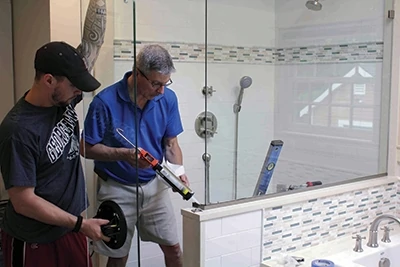
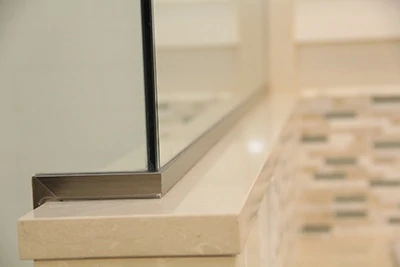
One question I get a lot is how to secure the frameless glass panels in place. The panels are secured to the walls with glass clips and 1/16 inch of space that is sealed with silicone.
On horizontal surfaces like half walls, the glass is installed in an aluminum channel which is bonded down to the tile or marble with a 3M VHB high-bond tape and silicone. The 3M tape creates a chemical bond or “weld” that is very strong and will not move. High-strength bonding tapes are a proven alternative to screws, rivets, welds and other mechanical fasten-ers. Unlike screws or rivets which join materials at a single point, the 3M bonds the entire surface and spreads any stress load across the entire length of the joint.
Glass Options
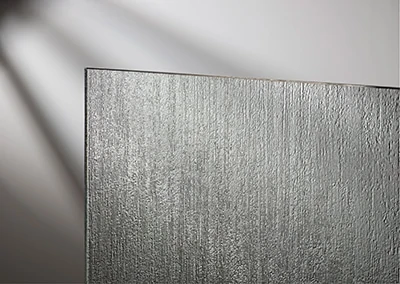
The best part of the shower enclosure is the custom glass element. Not only can you design the size and shape of your shower but the glass options offer you a variety of styles, from the open look of clear to distinctive artistic patterns, including beveled and etched glass.
Or, choose an option which limits the visibility into the shower:
- Rain glass
- Fluted glass
- Obscure
- Autumn
- Tempest
- Silk
Whether you decide to attempt a project yourself or hire a contractor to do it, insist on using safety-tempered glass. Safety-tempered glass is five times stronger than ordinary glass. When broken, it is also designed to crumble into small granular chunks instead of splintering into jagged shards. The granular chunks are less likely to cause personal injury in an accident.
Glass Coatings
Look for low-maintenance glass coatings. For example, Basco offers a glass coating called AquaGlideXP which is an ultra-protective coating that bonds with the glass to increase sheen and luster and prevent spotting, soap scum and mineral deposits. The best part of this coating is that it reduces maintenance by 60-70 percent.
I have this coating in my own shower and can attest that after two years of four daily showers, this glass remains clear and scum-free. You do not need to use chemical glass cleaner to clean it. All it requires is to spray it with water and wipe clean. At my house, we use a squeegee after the last shower, and an occasional wiping with a micro cloth. That’s it! If your shower experiences “hard water,” then this coating is a no-brainer.
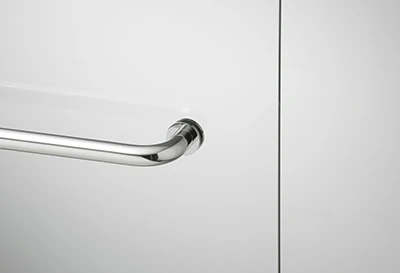
Choose the Door
You need to decide on how you want to enter your shower. Whether you choose a sliding door, swinging door or door-and-panel, make the decision that provides the easiest access.
For example, if you are building for accessibility you will want to look at the sliding door option. It easily glides out of the way and eliminates the clearance that a door swing requires. In order to have a sliding glass door, you need to plan on having an area for the door to slide into.
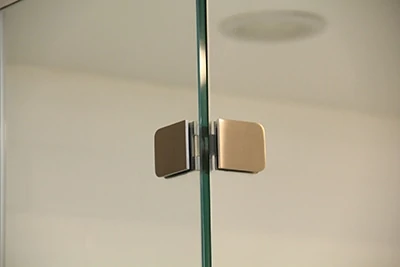
Choose the Finish
The metal finish colors options are designed to complement today’s most popular faucet and bath hardware. Most companies offer diverse enough selection to meet and satisfy even the most discriminating consumer. You should consider matching your trim, handles and hinges to your shower and faucet finish.
Some common finishes are Brushed Nickel, Oil Rubbed Bronze, Antique Pewter, Wrought Iron, plus many more.
Price Point
Glass is priced per panel and based on size. Each jump in size increases the price by approximately $150.
The size ranges are:
- 0-72”
- 72-76”
- 76-80”
- 80-84”
- Up to 102”
Installation of the Glass Enclosure
While it’s possible skilled persons could install these enclosures by themselves, I don’t see this as a DIY project. I highly recommend having an installer who specializes in glass enclosures perform this installation.
Most local distributers will key out your request to their network installer who will handle the measuring and install your glass shower enclosure.
The installation of a custom glass enclosure will add a level of quality and class to your bathroom like nothing else.
