That’s right inside. It may sound crazy, but unexpected, out-of-the-ordinary challenges are what make it Extreme How-To. After researching and talking to a number of professionals, I’d had enough of being told, “You’re crazy.” That’s all I ever need to hear to help me decide whether or not to take on a particular project. And that’s how it all started.
Down to the Nitty-Gritty The floor plan in my house is very open. The main floor consists of the kitchen, dining area and den. We decided to redo the entire floor in those rooms. To get started, we measured the floor and had the rocks delivered by a local supplier. The rocks consisted of quartzite material, and they were flat and in smaller pieces than regular flagstone. This made them much easier to handle and less expensive.
The immediate challenge we faced once the rocks were ordered and delivered was removing the carpet and vinyl sheeting. The carpet, padding and tack strips were easy to pull out. We found that, to save time and your back, it’s a good idea to cut the carpet into smaller, more manageable pieces to carry it outside.
The vinyl flooring, however, proved to be much more difficult to get rid of. The adhesive used for gluing the vinyl to the concrete slab was extremely effective. We tried a floor scraper, chisel, various drill attachments, floor adhesive remover and even the propane torch. The chisel worked best. I often find working with hand tools can be easier because they are not as heavy, loud or (accidentally) destructive. Always remember to wear eye protection, gloves and a face mask when working on this phase of the project because the dust and flying debris can be a real hazard.
Another thing to consider before you begin is doors, appliances, steps or other built-in fixtures. For instance, we had to remove both our entry doors, move their jambs and headers up and then re-hang the doors once the project was finished to clear the taller rock floor.
Finally, after completely clearing the dust and dirt, one last check was completed. The minor irregularities on the existing floor were dismissed, since the rock and mortar would eventually cover them. We decided to move forward and lay the rock.
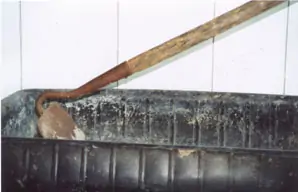
Getting It Done First we mixed regular mortar mix with water to use as adhesive for the rocks. Because the mortar has to hold the heavy rocks without shrinking or cracking, it needs some body to it. That’s why you’ll want to mix the mortar to be a little stiff; if it’s too thin then simply add more mortar mix.
For the best adhesion we used a fine mist from the water hose to dampen the concrete. A shallow bed of mortar was put down before buttering the back of the rocks with mortar. The rocks were then placed on the mortar bed and moved from side to side to secure a positive seat in the bed. A level was handy and periodically used to make sure the floor was laying flat and even. We used a rubber mallet to give each rock a final tap, pushing down any high spots. Any rocks that didn’t seat correctly were discarded or chipped to fit with a chisel and mallet. Extra mortar was used for grout around the rocks.
Mix the mortar to a whipped-cream consistency.
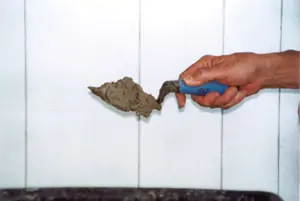
It should stay clumped together.
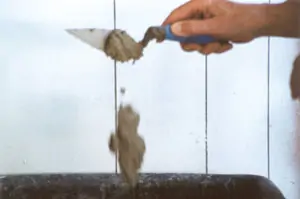
The mortar should slide off the trowel in one big blob.
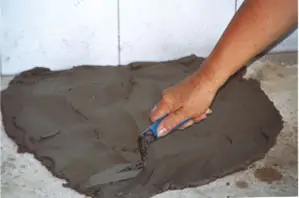
Spread the mortar on the floor in a 2-foot square area.
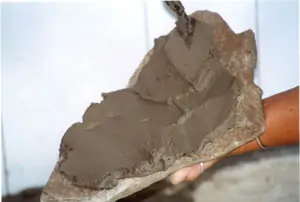
Butter the back of the rocks with the mortar.
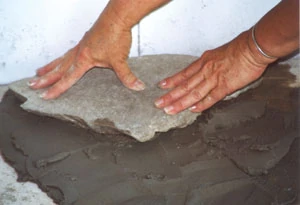
Place each rock down on the mortar bed.
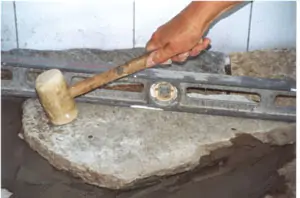
Use a level to make sure the surface is reasonably flat.
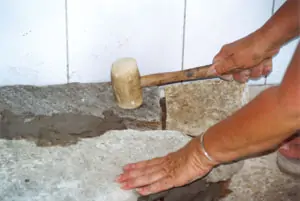
Use a mallet to tap down any high spots.

Spread more mortar into the joints to act as a grout.
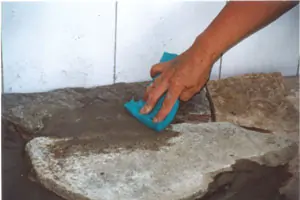
Clean the excess mortar off with a wet sponge.
Allow the floor plenty of time to cure before moving furniture across it.
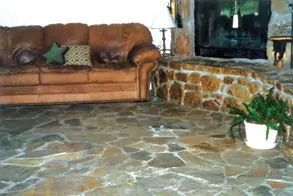
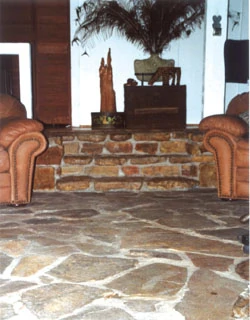
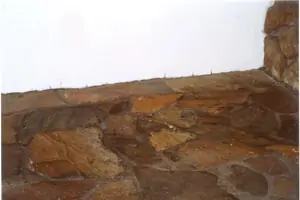
The End Result The project was a lot of fun, even though the floor was large and took a couple of days to complete. Visitors to my home are always impressed with the results. Personally, I am proud of the work and love my new rock floor.