
Installing a clay paver patio is great DIY summertime project that enhances the look of the home’s outdoor environment.
By Walt Steele
The warm weather is here, and it’s time to get outside.
A good summertime project for DIY’ers is to build a patio of genuine clay pavers. To get started, figure out how you plan to use the space.
Gather everything that you will regularly want on your patio—the grill, the children’s toys, patio furniture—and place everything where you will want it to go. Use a garden hose or spray paint on the grass to outline the size of the patio.
Visualize beforehand how you want the patio to look. Think about what the overall shape will be and what pattern you’ll use. A curved patio, for example, is less formal than a rectangular or square one. In terms of patterns, a basket weave pattern is ideal because full pavers can be used throughout in a square or rectangular shaped installation. Using a running bond or 90-degree herringbone in rectangular areas will only require half-cuts, while a 45-degree herringbone requires cuts around the entire perimeter. That would mean renting a wet saw for at least a day, which would add an additional expense to your project.
And before you start digging, always make sure the underground utilities have been located and marked.
Conventional installations require pavers, crusher run gravel and sand, edge restraints, a compacting machine or hand-held tamper and a broom.
As a general rule, conventional pavers require about 4 inches of compacted crushed stone as a base for pedestrian use; or deeper, to up to 8 inches for more harsh climates where ice heaving is a problem. For vehicular uses, a base of between 8 and 12 inches is recommended. Another good rule of thumb is to find out the generally accepted practices in your area and use them.
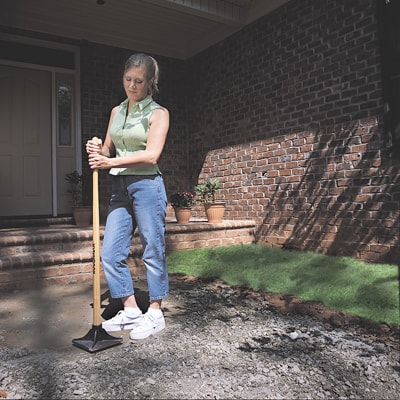
Dig down deep enough to include the depth of the crusher run gravel, one inch of sand on top of that, and the paver itself. When you’re done, the paver should be flush with the top of the ground. Dig six inches out beyond the area you will pave. Slope the soil about 1/4 inch per foot to allow for proper drainage away from the home. Next, tamp the soil down with the tamper or plate compactor.
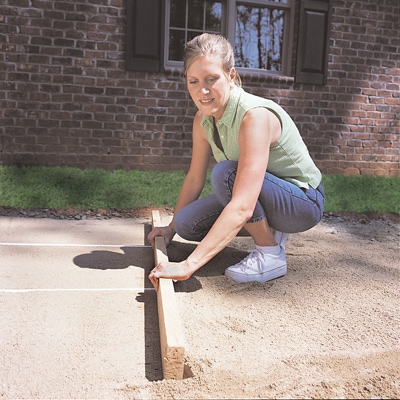
Put down the crusher run gravel and compact it well. Then, lay down two lengths of 1-in. PVC pipe, parallel to each other and several feet apart. Cover the pipes with concrete sand (course, jagged sand) and use a board across the top of the pipe to screed the sand level.
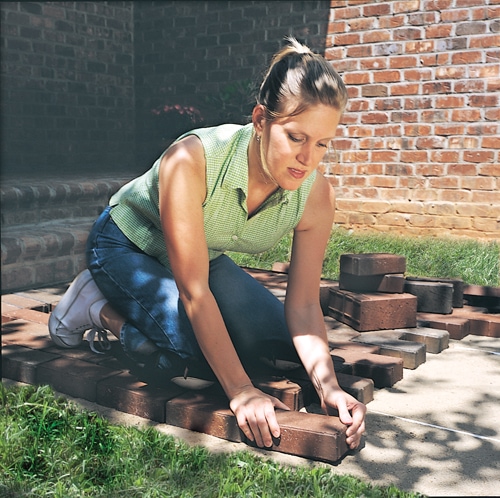
Remove the pipes and use a trowel to fill and smooth the voids. Lay the pavers in place, using string lines to ensure a straight pattern.
Next, install edge restraints, which can be metal or plastic, or even a row of finished pavers stood on end and buried to finished height. Troweled concrete that’s later backfilled can also be used as the edge restraint.
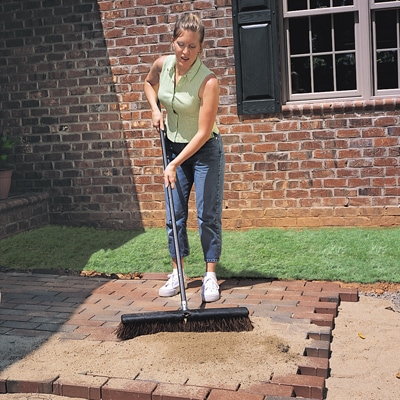
Tamp or compact the pavers into the sand bed using a piece of scrap plywood, a square of old carpet or a plastic pad on top of the pavers to avoid chippage. After that, sweep sand into the joints. In a week or two, you’ll want to see if more sand is needed in the joints after it has settled.
Existing Concrete
To install pavers over an existing concrete patio or walkway, begin with thinner pavers that are 1-3/8 inches thick and made for this purpose.
Lay a “soldier course,” which means laying a line of bricks perpendicular to the edge of the concrete to form the outside frame of your project. Use four dots of masonry adhesive on each brick, each about the size of a penny, which allows rainwater to pass underneath.
On the inside of the soldier course, cut pieces of roofing felt to put a single layer inside the frame covering the concrete. Don’t overlap the felt edges. Then, lay a second layer of felt perpendicular to the first, over the top of the first layer. The felt keeps the pavers from rocking against the concrete when you walk on it.
Starting at one corner, begin laying the pavers in place, leaving a 1/8-inch gap between the pavers. Finish by sweeping sand between the joints until they are full.
Permeable Pavers
Permeable pavers are somewhat similar, except that special open-graded aggregates without fine particles are used instead of crusher run and sand. Additionally, the permeable pavers themselves have larger nibs—spacers that keep the pavers apart—and allow water to seep in-between them.
Figuring the depth of the underlayment is also different. The standard method is to dig down a minimum of 12 inches. Some installations, such as streets, will require a deeper excavation. Since the idea is to trap stormwater and then release it slowly into the ground underneath, the depth depends on how much water needs to be handled, and that’s a question for an engineer.
A #2 stone is used as a subbase, followed by a finer grade of #57 stone. The bedding layer, just beneath the pavers, is made up of #8 or #89 aggregate, which is also swept into the joints. Every 4 inches of depth, the aggregate is rolled or compacted into place. Once the surface is prepared, the pavers are put into place.
Editor’s Note: Walt Steele, is a recognized expert on clay pavers. He is paver business manager for Pine Hall Brick Company.
Steele can be reached at (800) 334-8689 and at [email protected].
For more information, visit www.PineHallBrick.com.
Other Patio Articles
- Designing your Patio
- Pro Tips for Deck Maintenance
- Building a Patio Cover for Wet Weather
- Building a Patio Shade