
It never ceases to amaze me that something as rough as sandpaper can render raw wood flooring so perfectly smooth and in plane. It extra-amazes me (if someone can be “extra” amazed) when you load the heavy-grit stuff onto the heavy-weight, high-power sanding equipment to bring a raw floor surface from rough to ready.
What also befuddles me is that I tackled this job myself.
See, as a contractor, I almost always subcontract floor sanding out to a specialist contractor. Usually they can do it better, cheaper and faster than me or my crew, especially on large projects. However, this particular floor had a time budget that was running low, and rather than wait weeks for a contractor to find a hole in his schedule, I rented the equipment and tackled the job myself.
While I’ve sanded floors before, I learned some things on this one that can save a few headaches.
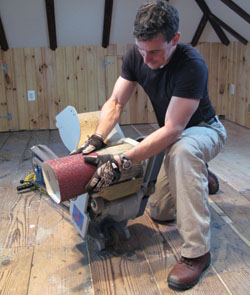
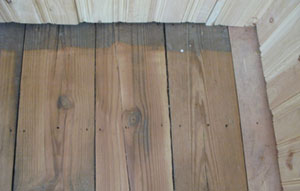
Note: You’ll notice that the floor shown in the step-by-step portions of the article is not a standard floor. Instead it’s top-nailed, wide plank Douglas fir barn boards. That means the photos may not look exactly like the T&G red oak or maple usually found in residential flooring, but the techniques are the same.
Preparation and Timing
Prepping a room for sanding, in my experience, is about bracing for a dust storm—both in the room to be sanded and throughout the house.
Dust. First, the room you’re sanding must be empty, i.e. everything off the floor. Some sanders kick up a lot—and by a “lot” I mean a LOT—of very fine dust. That means it will settle on every shelf, picture frame and knick-knack. It may even float through the house, which is a problem you simply don’t want to have, especially if you’re remodeling an occupied home.
Take everything that’s not nailed down out of the room. It will be faster than dusting it all and/or cheaper than hiring a maid after the fact.
Indeed, the dust collection in the sander I rented failed halfway through sanding my floor, so I not only had airborne dust, I had piles of it on the floor. Ugly. I also suggest renting or buying an air cleaner. Stick it in a doorway or somewhere else out of the way (and off the floor, of course) to chow down on dust. They work great funneling airborne particles.
Molding. It usually makes sense to remove and replace the shoe molding if you can. You don’t have to, but chances are you’ll hit the existing molding with the edge sander and have to fix it anyway. Plan for this. One trick is to replace painted shoe molding with a shoe that’s the same species as your floor and you then finish it to match the floor. This is faster than painting and looks nice.
Timing. Be ready for the prep/sanding/finishing process to take more time and be more physically taxing than you think. You may have problems with the finish or even the rental equipment itself, which happened on my project.
Tools
A mix of specialty and common tools are the requirement d’jour for getting the job done.
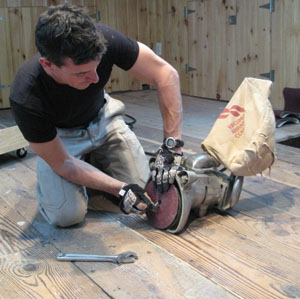
Of course you’ll need to rent a drum sander (a tool I liken to a lawnmower for floors, except that it’s a lot heavier) and an edge sander (an orbital sander on wheels that looks like it mainlined sander growth hormone).
You’ll also need a broom/dustpan combo, a good shop vacuum, and a heavy-gauge extension cord. And then there’s the various and sundry hand and power tools you’ll need for stuff like replacing the shoe molding, setting a nail or two, etc. Having a 6-inch random orbital sander is pretty handy, too, especially if you’ve got stairs to tackle. Make sure you get some seriously gnarly grits for that tool before sanding. The typical selection I’ve seen at home centers aren’t nearly aggressive enough for the heavy work of removing a floor’s finish and/or heavy stock removal.
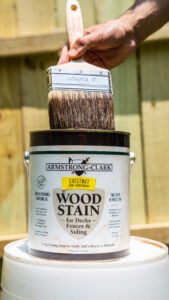
You’ll also need paint brushes, the finish-appropriate applicators/handles, pails and mineral spirits for the finish and cleanup.
Renting The Sanders. Unless you’re a flooring contractor, nobody owns drum and edge sanders; renting them is the only way to go. Unlike dedicated commercial sanders that run on 220 power like you may have seen on jobsites, the sanders available for rent run on 110. They don’t quite have the power of a 220-powered unit, but you’re not doing this work every day so the efficiency lost isn’t really that measurable. I found the unit I rented had more than adequate power for the floor I sanded, which was in seriously bad shape.
Plan ahead and reserve them for the day(s) you plan to use them. Nothing’s worse than clearing out a day for sanding only to find all the sanders are already rented. And when the rental shop offers you extra paper, take it. If they don’t, then request some. You may end up using it; if not, you can return what you don’t use.
Also, get some help or a use weight-lifting belt. The drum sander I rented weighs about 100 awkward-to-carry pounds, and it’s brutal to lug up and down stairs, in and out of a vehicle, etc. It also means that you have to be careful when you put it down. Dropping something this heavy on a finished floor is bad for both the tool and the floor. With this in mind, you can usually get a damage waiver from the rental company, which I suggest buying. Mine was on the order of 11 bucks, totally worth the piece of mind.
Daily Grind
Here’s the basic protocol for sanding your floor, whether you’re knocking down raw wood or stripping an existing finish. You’ll go through this three times using increasingly finer grits of paper as you go: 20, 36, 100.
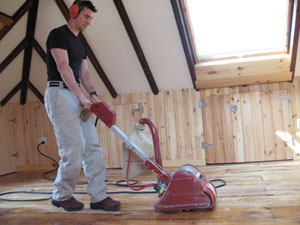
Drum First. Hit the floor with 20-grit paper to bring the floor strips into plane and/or knock down the existing urethane. You’ll also want to use a dust mask and ear protection. There’s dust in the air, and man are these things loud. Whoa!
Move the drum sander parallel to the wood grain, just as if you were using a belt sander. Ease the unit down and lift it gently (there’s usually a lever for this; however older units require you to do it manually) to mitigate gouges where the drum contacts the wood. Also, let the unit move forward as the paper grabs the wood. Again, it doesn’t prevent gouges but mitigates them.
I found it easiest to sand in one direction, i.e. in a room that runs east-west, I would start the sander on the east wall and sand a strip all the way to the west wall. Once there, I’d lift the sander from the work and then—without sanding—pull the machine back to the east wall. There, I’d position the sander overlapping my initial pass a few inches and start again. Repeat this process all the way across the floor making sure to move slowly and methodically to cover as much floor surface as possible.
Don’t be frugal with the paper. Once you notice the paper has slowed its cutting speed, it’s pretty much worthless in my book. It has either gummed up with finish or worn such that it no longer cuts the wood effectively. Swap out for a new piece. Note: Paper isn’t free by any means (you can easily drop 100 bucks or more on paper for a single room). But the goal is to get the best finish possible, and the best way I’ve found is to keep the paper fresh.
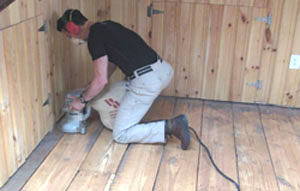
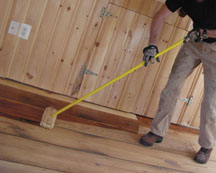
Edger. Once you’ve made a complete pass with the drum sander, it’s time to use the edger to do two things: First, get the edges (duh), but also—and this is really important—smooth out the gouges left where the drum sander entered and exited the work.
The gouges will be subtle and hard to see in a raw floor (one without a finish on it). They’ll be easier to make out if you’re removing a finish. If you don’t know what to look for, then don’t be faked out and think the gouges are not there because you can’t see them. They’re there, running like a ragged, round-bottomed valley right where you lifted the sander into and out of the work. Shining a bright work light on them really helps, and once you’ve seen them, they’re easier to pick out. In this floor, they were tough to miss after the first pass.
Run the edger so it smoothes out these marks and completes what the drum sander can’t access along the room’s perimeter. Sweep and/or vacuum the dust from the floor between passes.
Note: Do not underestimate how important edging is. It’s not brain surgery, but if you reach the end and haven’t gotten the gouge marks out of the room, the finish you apply will highlight them like a Klieg light shining on a mirror—and somebody’s gonna be disappointed.
Drum Again. Switch to the next finer grit of paper, 36 grit, and hit the floor with the drum again. To make things fair, I switch my sanding direction from west to east this time.
Edge Again. Switch out to 36 grit. If this were shampoo, the directions on the bottle would be “rinse and repeat.” Also, if you have a foyer or landing, you may not be able to get the drum sander in there. In this case, hit it with the edger, following the grain of the material as best you can.
Seventh-Inning Stretch. Sanding requires that you are basically bent over for an entire day. It’s tough on the back as I found out. I also found that periodically stretching was helpful, as was staying hydrated.
Applying Finish
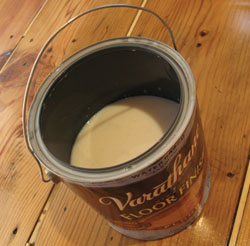
The world of flooring finishes—i.e. urethane—has changed a lot recently. New regulations on VOCs (Volatile Organic Compounds) require fewer solvents in oil-based formulae, which helped them dry faster. There are also water-based finishes that dry quickly and set up nice and hard. They’re still not entirely on par with oil from a final finish perspective, but 1—they’re really, really close according to manufacturers; 2—they dry a heck of a lot faster; 3—may require less sanding between coats; 4—they stink a lot less; and 5—they clean up with water. That said, I’ve talked with some flooring veterans, and they like oil. Water-based finishes also “amber” the wood less than oil, something worth considering.
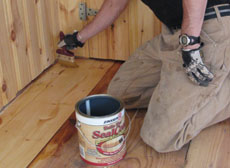
Prep Work. Whichever kind of finish you choose, manufacturers recommend pre-treating the bare wood. For an oil-based finish a sanding sealer is recommended and it works sort of like primer for a paint project. For water-base urethanes some (not all) manufacturers recommend a water-based base coat to seal the wood. They say the reason is that many water-based finishes have a high pH level that can react with the tannins in bare wood, causing it to discolor. Other manufacturers don’t require a base coat.
Dust is the enemy of a good finish. Thoroughly vacuum the floor before applying your finish coats. This means clean the vac filter—outside. I usually blast mine clean with compressed air and a blow gun. If you’re using the Festool dust extractors and a bag like I did, this kind of vacuuming is practically what this tool is made for. When vacuuming, make sure you get everything you can. Be methodical here. Taking two passes isn’t a bad idea at all.
Get the Tools. Once you’re applying finish you’re going to assuredly get urethane on your shoes. It’s just the way it is. The last thing you want is to have a brush, stir stick, applicator pad, paint can opener, etc., right where you can’t reach it. This can cause you to absent-mindedly trundle through your house tracking urethane behind you like a piece of gum stuck to your shoe. As you walk to your saw-dust saturated shop to look for whatever’s missing, you’ll drag no small amount of dust back with you to find an eternal home in your urethane, like a colony of Jurassic insects fossilized in amber.
I also keep my dust mask on during this step. Any part of oil-based urethane I can keep out of my system makes me happy. Water-based urethane doesn’t feel—or smell—as gnarly to me.
Warning. If the words “slather it on” enter your mind, power-wash your brain. Slathering is a big mistake, especially with some oil-based products (see sidebar). Urethane likes to go down in nice, thin coats.
Sequence. I like to brush the perimeter of the room before hitting it with an applicator. It means I have better control of where the urethane goes, and I can get good coverage without splashing it on the wood work. Note: While you may not be able to see over-painting now, you will later, especially with oil, so be careful.
Sanding Between Coats. It depends on what kind of product you choose—oil or water—as to what kind of sanding you’ll have to do between coats, or not. The key here is to follow the manufacturer’s instructions carefully; i.e. read the entire can. Make sure you give ample dry time between coats. Humidity and temperature can extend dry times significantly.
Professional floor guys use a buffing machine to abrade the previous finish before applying the next coat. It’s a commercial machine you can rent and it’s very thorough. You can also abrade the finish yourself using more sweat equity than checkbook-power by putting 120-grit or higher sandpaper on the end of a sanding pole (like drywallers use) and abrading the finish that way. You’re only trying to scuff it up to accept the next coat more easily, so don’t go crazy. Just make sure you cover the entire surface and then vacuum thoroughly.
Final Finish. Apply the last coat. Check the can again and make sure you give ample time for the urethane to not just dry—but cure—before moving in furniture, playing basketball or going bowling on your new, shiny, wonderfully sanded floors.
Editor’s Note: Mark Clement is a carpenter and author of The Carpenter’s Notebook, A Novel and Kid’s Carpenter’s Workbook, Fun Family Projects! Visit www.TheCarpentersNotebook.com.

Not Created Equal
Having to sand the floor twice meant that I needed to rent the sanding equipment again. I used two different sanders from two different rental shops in my projects and found a few more time-saving tips:
All sanders are not created equal. The first sander I rented was new. It was powerful and left a primo finish. Also, swapping out paper was a breeze. The second sander I rented was an antique. It worked, but not nearly as well. Swapping out the paper took a long time and required me to dig around in the “vintage” section of my tool bags to locate my slot head screwdriver.
The punchline is this: When calling around to rent sanding equipment, ask how old the drum sander is and how you swap out the paper. A new machine will provide a nice finish faster in my opinion.
— M.C.
Good News, Bad News
I’ve subbed out plenty of floor jobs in my contracting career. Indeed just two years ago the flooring guys I hired applied sanding sealer and the first coat of urethane to a five-room floor job in a single afternoon. The next morning they were back to buff and throw on the second coat of urethane. The floors dried, no fuss no muss and the house was ready for normal traffic in about 48 hours. This is what I was expecting when I applied my finish.
No dice.
First, the Bad News. I used a clear gloss Minwax High Build Polyurethane and, well, I had problems.
First, I’m a stickler for following directions. Even though I’ve applied my share of polyurethane over the course of my career, I still read the can before using a product I haven’t tried before. However the can’s language, while technically accurate, doesn’t quite do justice to just how finicky this material was.
I brush-applied the material to the perimeter of the floor, the stairs and an old plaster wall that was designed to have an antiqued/Southwest look to it. These areas dried in a reasonable amount of time albeit longer than the directions on the can indicated, and the finish looks good.
On the main part of the floor, however, I used a lamb’s skin applicator (one of the recommended techniques) and, well, 13 days later the floor wasn’t even close to cured (so much for saving the time I was trying to save). While Minwax has assured me the finish would dry, my time constraints demand I strip this finish and start again. I’m not thrilled.
Second, the Good News. Minwax was extremely helpful, responsive and polite when I called. Not only was the tech support person I spoke with, Ily, on the 800# helpful, she was extremely knowledgeable about the product. As a double-check I also called a product manager and she, Julie Brock, told the same story. And this is how it goes:
The new VOC-compliant finishes have fewer solvents in them than older formulae. That means they dry slower and are more sensitive to environmental conditions than before. If you apply too much—and it takes almost nothing to apply too much, which is the point of this story—it dries much slower.
If you have mitigating circumstances like high heat and humidity (which I did), then it dries another factor of slower. Both Ily and Brock assured me it would eventually dry, but I don’t have time for eventually. Brock also suggested I use Minwax’s Fast Dry Polyurethane, but my retailer didn’t sell it.
In the end I had to re-sand this floor—it was brutal sanding off wet finish—and I re-applied water-based finish. With tropical storm Barry literally over my head during the application process, I got the recommended four coats on—and dry—in 24 hours. The floor cured in 72 and was move-in ready.
Minwax provided good customer service, but I think the can’s language needs to be seriously updated about the downside of the product’s performance. The upside is that the portions of the room where it did dry look great.
— M.C.