

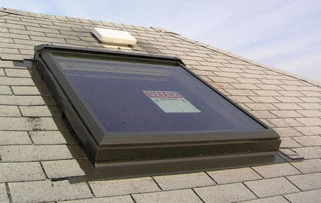
Skylights are a terrific addition to most living spaces, especially if they open. The natural light they let stream in is better than anything that comes out of a bulb, the air they allow to circulate is fabulous, and—if you’re lucky—you get a nice view in the process.
Assessing the Challenges
There are four major challenges to prepare for prepping for skylights: safety, layout, moving the skylights and making the cutouts.
Getting There. Skylight installation requires a little more forethought than other projects, mostly because they usually get installed pretty far from the ground. So, the first order of business is planning a safe route up to and down from the roof, and creating a stable work area top-side. We did this with ladders, roof brackets and a walk board.
Interior Layout. The skylight units have to be positioned at the proper height along the rafters for optimum aesthetics, head room and view. And, unlike most other installations, the skylights shown here have no shaft but instead will be wrapped with solid pine to match the room’s trim package. Finally, on this project there are two skylights on opposing planes of a hip roof, so they need to be parallel and even with each other on the inside of the room. We did this by framing one then using it as a control point to layout the other.
Moving the Units. The units installed in this project, two Velux VS606 manually operable skylights, are what my roofers commonly refer to as 4-by-4s. This means they are about 4 feet by 4 feet. This also means that they are big and really heavy, so planning and providing for that is key when moving them into location on the roof. Moving them safely was accomplished by smart design: The glass is removable.
Cut-Outs. Another challenge was tying the skylights into the existing roof system—without tearing out and destroying piles of old 3-tab shingles. By cutting back the shingles and weaving in the flashing parts, I was able to integrate with the roof system—with minimal invasion and demolition.
Positioning & Layout
Positioning Skylight #1 was pretty basic and somewhat arbitrary. I worked with the homeowner to establish the height she wanted, and that was that. What wasn’t so basic was transferring the measurements for its mirror on the other side of the room.
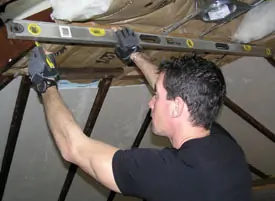
Framing #1
The instructions that shipped with the Velux VS606s indicate that you should do a rough layout, then cut an exploratory hole in the roof deck to line up the hole with the roofing material layout. Unlike many carpenters I know, I’m a big fan of following directions to the letter, but sometimes site conditions require adaptation.
Our first challenge was that it was winter (albeit a warm one), and the house was occupied. Second, I don’t like cutting out rafters without adding the replacement framing right away. I know you can, but I don’t like to. And finally, the homeowner wanted the skylights where she wanted them. End of story.
This meant that I did all my layout on the interior then cut out the center rafter (see sidebar on pg. 54). Next, I installed all my framing, then cut out the hole. The last thing I did was pre-set a screw in each corner of the skylight so I could locate them on the roof later.
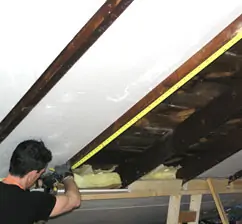
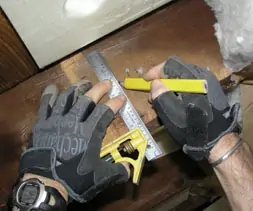
Layout and Installation Details. The rough-opening (RO) for the Velux VS606 is 44-3/4 inches wide by 46-1/4 inches tall. The unit centered between two rafters, so that was easy. To position it up and down along the rafter I used a stick 46-1/4 inches long to show where the top and bottom of the frame would be, then marked it when the homeowner picked the location she wanted.
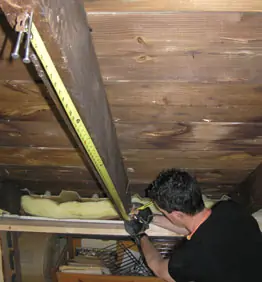
Next, I struck a level line across the top of the RO and made my marks for headers—making doubly sure that I made 2-by’s on each rafter (top and bottom) to indicate the header-side of the line. I drove nails in the rafters on the pencil line to hold my tape, and pulled down to mark the bottom of the opening. With all four corners mapped out, I used a combination square to mark the exact cut lines on the rafters and cut the rafters.
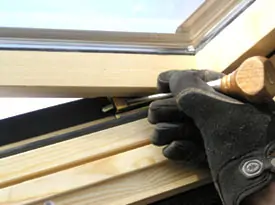
Header Installation. Header installation is basic and straightforward: Cut the pieces to length and install on your layout lines. Things get a little trickier when you try to add detail, such as a flared opening.
I swiped the flared opening detail from the Velux instructions. You do it by installing a 2-by-6 on the flat next to the RO line and installing the header behind it. On the front edge of the flat 2-by-6, add another 2-by beveled 30 degrees as a nailing board for drywall or trim.
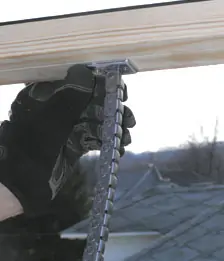
Almost Through. The last step inside is to pre-set a 3-inch deck screw in each corner of the framed opening. Don’t puncture the roof surface until you’re ready to complete the skylight installation.
Framing #2
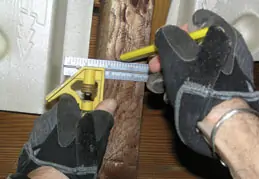
With the headers installed for Skylight #1, I used them as control points for Skylight #2. A 6-foot level was the key for transferring measurements across the room at the shortest point—the ceiling. I made all the necessary marks then followed the same layout and marking process for Skylight #1.
Out on the Roof
The next step in the skylight installation is to cut the hole. But, before climbing to the roof, safety is the first priority. Make sure you know how to use your ladders properly and either install roof brackets and a walk board, or tie-off with a proper safety harness, or both.
I used roof brackets and a walk board on this project. They provided an excellent platform for staging tools and materials and created a barrier between me and the ground, a handy feature.
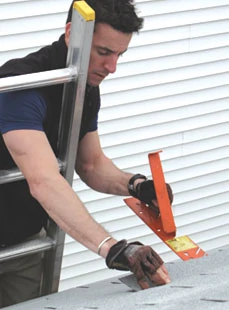
Snap Lines. From the inside, drive the four corner screws pre-set earlier up through the roof deck and shingles. Outside, snap lines between all the screws.
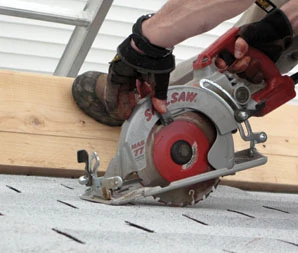
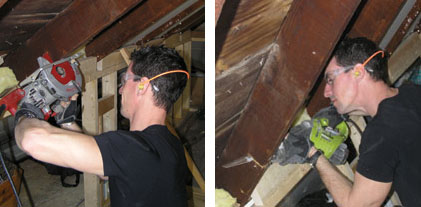
Cut the Hole. Next use a circular saw and a blade you’re no longer fond of to cut through the roof decking. It goes without saying that you should stand outside the lines when you’re cutting, but I’ll say it anyway: Stand outside the lines when cutting.
The roof decking is likely to fall inside in one large piece—especially if it’s plywood—so make some provision on the inside for this as required. Either just let it fall to an area that can take the hit, or cut it out in smaller sections so someone on the inside can handle them as they come free.
This is also a primo place for safety glasses. Between shingle granules and cutting nail shanks in half, there is a lot of gnarly stuff flying around at very high speeds. The last place you want it is in your eyes.
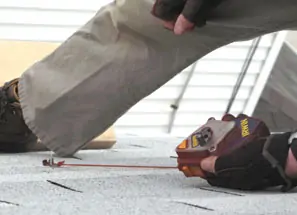
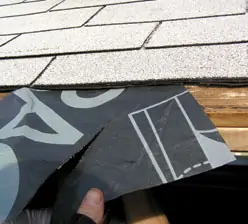
Cut Back Shingles. The next phase of the project is to use a circular saw or Roofmate’s Shingle Saw (the ultimate roofing tool by the way!) to cut the shingles back 2-inches from the hole on the sides and 3-inches on the top and bottom, to expose the roof decking.
Prep the Skylight
There are three things to do to prep the skylight for installation. First, remove the glass. This takes two people and pressing a few tabs and buttons in the skylight hardware, but it is well worth the effort. Set the glass safely aside for later.
Next, bend the mounting tabs back and clinch to the side of the skylight frame.
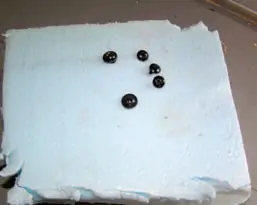
Last, strip the flashing package off the glass and set both aside carefully. You’re going to have a few little aluminum screws hanging around from the various flashings. Here’s a handy tip: Keep them safely stored until needed by embedding them in a scrap of rigid foam insulation.
Self-Adhesive Membrane
Velux recommends that a self-adhesive membrane be installed in all areas with severe weather. I live in an area with severe weather and didn’t want to skip this step (though I have installed many skylights long before the existence of self-adhesive membrane, and they didn’t leak). That is part of the reason for cutting the shingles back from the opening.
Tuck and Peel. Starting at the bottom of the opening, I tucked 5-inch strips of Grace Ice & Water Shield under the shingles and on top of the asphalt paper.
Going up each side, I tucked a piece under the shingles and over the bottom piece of membrane. When I reached the next layer of asphalt paper, I slid the Ice and Water Shield under it directly over the roof deck.
At the top, I tucked a piece of membrane directly over the roof deck, then folded it over the side pieces. Once the pieces were installed, I reached under the shingles and peeled the paper backing off, enabling the membrane to stick to the roof system. This was…well…frustrating, but it worked.
If water did manage to get under the shingles and asphalt paper in the vicinity of the skylight, it would be caught by the membrane and have a way to flow out of the roof system. The last step is to slice diagonal slots in the paper and fold it back so you can install the skylight frame.
Again, this is an extra layer of protection—the flashing should keep everything out—but having the membrane in there too makes me sleep better at night.
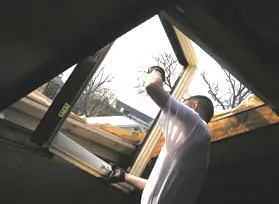
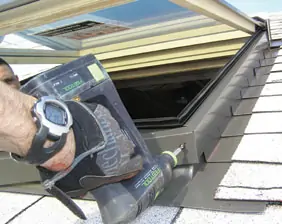
Install the Skylight Frame & Glass
With one person working from inside the house and one working on the roof, pass the skylight frame through the opening.
Frame. Set the skylight in position on the roof deck. Double check that the unit is centered in the opening. Fasten to the roof deck with the supplied nails. Then, working from the bottom up, wrap the side of the frame with membrane. I added “patches” to cover the corners where the paper had been cut.
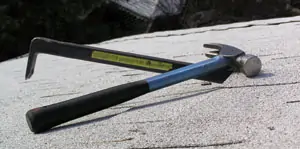
Tool Tip: You need your hammer a lot when installing a skylight, but you’re standing in a weird position to reach into your tool pouch a million times. So what I did was make a little shelf with my flat bar so I could keep it within arm’s reach at all times.
Glass. Re-install the glass in the opposite order you removed it before installation. Make sure the chain is reconnected securely and that the glass itself is locked in place.
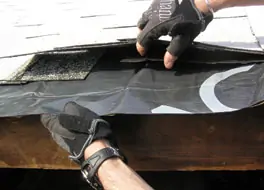
Install the Flashing Kit
The flashing kit for the VS606 is Velux’s EDL+ and works with shingles or shakes.
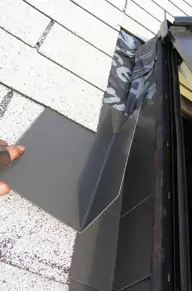
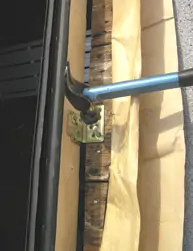
Start by installing the sill flashing, then work your way up, weaving in the step flashing with each course of shingles. Then, re-install the flashing package stripped from the glass previously and finish off with the head flashing.
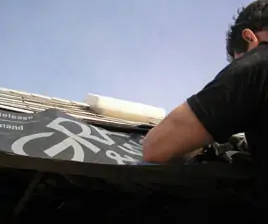
It is key to get the head flashing under all the layers of shingles above the skylight opening, or you will have a leak for sure. Working it under all those shingles and asphalt paper is tricky, but doable. Carefully pry up the shingles and nails with a flat bar and slide the head flashing underneath.
Technique Tip: The screws from the flashing package are aluminum and don’t stick to magnetic driver bit holders. Consequently several of the ones supplied to me are waiting 30-feet below in the yard with the needle in the haystack. I used 3/8-inch lath screws as replacements and sealed the tops of them with roof cement to prevent leaks and corrosion.
Shingles. This process can be tough on shingles. Have a tube of roof cement ready to roll to make any quick repairs.
Test
If you’re going to have a leak, it’s best that you know about it before you take the ladders down. I grabbed a garden hose and absolutely full-blast drowned each window for five minutes before coming down from the roof. Not a drop got through, and after multiple driving rainstorms they are still dry as a bone.
The skylights also provide the homeowner a view that she didn’t know was there.
And that’s what skylights do best.
Moving Skylights: What Not To Do
I had a grand vision when I started this project. Rather than run up and down a ladder all day, I rented an articulating man-lift. With the press of a button I could maneuver myself—and each skylight—45-feet in the air quickly, safely and easily. However (and this is a big however), site conditions need to be right in order for a piece of equipment that big to be operable.
See, it had been raining and the ground was soft. The rental company delivered the unit, and I walked through what I was going to do with the driver. He gave me tips and pointers, which were helpful. What he didn’t give me was any pointers on what to do when this behemoth machine—and 2-wheel drive, I might add—sunk like a stone into the wet grass.
After about 8-hours and a lot of help, I was finally able to get the machine out of the mud. I came away with a lesson (and a landscaping repair.)
First, unless it has been bone dry for weeks, get a 4-wheel drive model. They have bigger tires and, if they do get stuck—duh—they have 4-wheel drive. Second, if the company from which you rent the machine can’t determine which one is best for your site conditions, get the 4-wheel drive unit.
Cut-Outs
I’ve remodeled and retro-fitted enough to know when to be careful and when to whale away at something. Ironically, I’ve found one of the places I have to be most careful is when I want to have the most fun—demo. Alas, the neater you are, the easier life is later.
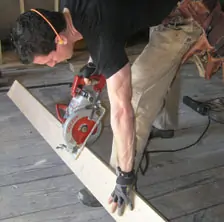
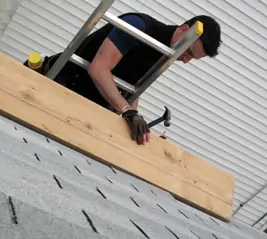
I wanted the headers to fit square against the removed rafter end, which means I needed a square cut. To get a square cut, I laid it out on the sides and bottom of each rafter using one of my favorite layout tools, a 7-inch Stanley combination square. I started the cut with my circular saw, placing the blade right on the line and for a nice, low-impact cut. Then, I finished the cut with my recip saw.
After the center rafter is cut, I use a flat bar and my hammer to pry it free (without prying the 100 year old roof decking free). Fortunately the guys who built this house used 16-penny nails for their sheathing (I guess all the railroad spikes were being used!), so taking this rafter out was a bear. The last step is installing the new header stock top and bottom.
I like doing it this way because I can prep the job even in bad weather. Or, if I have to leave for some reason, the roof system is still intact. The last step for framing the header—and to make my inspector happy—is installing joist hangers.
Mark Clement is a remodeler and author of The Carpenter’s Notebook, A Novel and Kid’s Carpenter’s Workbook, Fun Family Projects! www.TheCarpentersNotebook.com.
