


For years I had one of my drywall buddies take care of most of my drywall repair, and for years he would say, “you know this isn’t that hard.”
Finally, I heeded one of my favorite jobsite sayings, which is “don’t be scared.” I mean, what’s the worst thing that can happen when doing drywall repair? The drywall doesn’t have to fit perfectly, and all the joints and fasteners get covered with a plaster-like coating. To top that off, several types of textures are available to camouflage the job.
Now, this is not to downplay the importance of professional drywall installers. When it comes to hanging, taping, and texturing big jobs, they can get it done right in a fraction of the time it would take us. But when it comes to repairing, we can do this stuff.
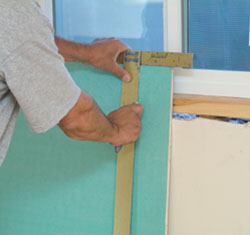
A drywall T-square makes cutting drywall a quick job. I hold the square at the top and press my foot against the bottom, using it as a guide to cut the paper face with my utility knife.
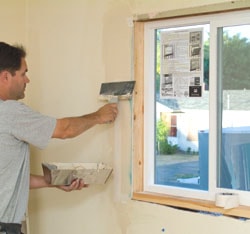
When you watch professional drywallers do touchups and repairs you can tell they aren’t afraid to spread a little mud around. On the jobsite it’s not uncommon to see one of the guys on the drywall crew walking through a nearly finished house with a taping knife and a tray full of joint compound, fixing minor dings and scratches on the walls. They spread the mud around because they can match the texture. When the repair is painted the finish will blend together.
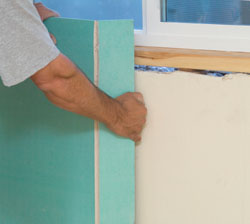
After cutting one face, snap the board back.
There are, of course, lots of reasons for drywall repair, such as water damage, construction dings, and cars being driven a bit too deep into the garage. When we are remodeling, we create a lot of these repairs on purpose. Sometimes we need to open the walls to run wire and pipe, or we change the size and location of window and door openings. We straighten crooked studs and install handrail backing. All of these projects require some drywall repair.
When it comes to making any kind of repair, it’s best to know the basics of how a product was installed in the first place. Most of our modern houses have interior walls made of gypsum board over studs. The studs are usually spaced at 16 inches on the center, and the most common size for the drywall panels is 12-by-4 feet. The long edges of the panels are thinner than the field, which allows room to build up joints flush with the wall plane.

Cut the back paper face to finish separating the piece.
The joints are finished with a combination of tape and joint compound, which is sanded smooth after drying. The surface is then textured and painted.

Attach the piece to the wall with drywall screws. Be careful not to break the paper face with the screw head.
To some degree, all drywall repairs will repeat parts of this process. Even if you are just spackling a few nail holes from a previous wall hanging, you need to pay attention to how it affects the texture. If you use too much spackle and smooth out the surrounding area, the repair will be noticeable.
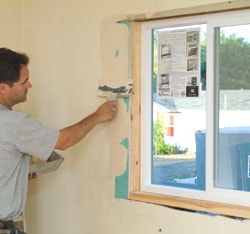
Add a thin layer of joint compound over the joint.
Tips and Tricks
You’ve probably seen attempts to repair the hole made from a door handle. Spackles and joint compounds sag in a hole this big, so reinforcement is necessary. If the webbing or tape used adds too much to the thickness of the area, the results can be less than desirable.
Often the best solution for this type of drywall repair is to replace the damaged board with a new piece of drywall. Gypsum board itself is relatively inexpensive, and I usually keep a few scraps around to make repairs. In most residential applications, the ceiling boards are 5/8-inch thick, and the wallboards are 1/2-inch thick. Specialty panels are available for areas such as utility rooms and bathrooms where water or high humidity may be an issue.
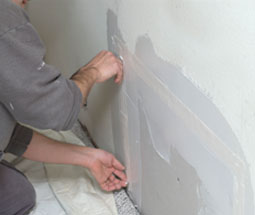
Apply joint tape over the first layer of the joint compound.
For smaller repairs, I cut the patch piece first, place it over the damaged area and trace around it.

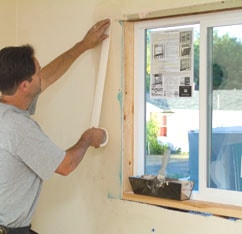
Smooth the tape flat with the joint knife.
To secure the gypsum-board patch in an area between studs, insert a small piece of wood behind the existing wall boards in a way that bridges the backside of the hole. Screw through the existing wallboard into the wood piece to secure it. With the wood backer in place, you are now ready to position your patch and screw it into place.
Apply another layer of joint compound over the joint tape.
When replacing larger pieces of sheetrock, consider the location of the studs. I take care not only to find the studs but also to determine the center of the studs at the left and right edges of the patch. I cut the existing board down the middle of these two studs so the newly created joints will fall in the center of the studs.
After the joint compound dries, sand it flat. Be careful not to get into the joint tape when sanding.
Make sure all old fasteners are either removed or driven into the studs flush so that the new gypsum board sits tightly against the studs. If your patch piece is a bit too tight, you can shave some off of the edges with a rasp or a Surform plane. Don’t try to force the patch into place. A little gap in the drywall is not a problem.

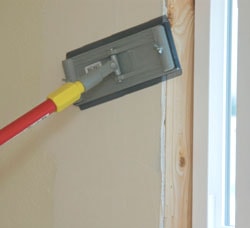
We used a level to mark the center of the stud on a recent water-damage drywall repair.
Nailing and screwing off drywall takes a little finesse. You want to slightly dent the paper face without breaking through. Nail or screw heads left too high won’t finish properly, and those driven too deeply won’t hold the board. It’s OK to make a slight dent in the paper face with your hammer, but don’t get too carried away.

We cut up the center of two studs so the replacement piece and the adjacent boards can all be anchored on the studs.
All seams in drywall should be covered with joint compound, joint tape, and more joint compound. Professional drywallers have special tools designed to dispense joint compound on both sides of a piece of joint tape. For small jobs, however, applying joint compound and then placing the dry joint tape over it will get the job done.

Drywall nails are designed specifically for this application. The heads are very thin, which helps them recess for easy concealment. Making a slight dent with the hammer and without tearing the paper face of the gypsum board is the goal here.
After two or three coats of joint compound over the tape and over the fastener heads, sand as needed to get the whole job smooth.
Don’t overlap the vertical and horizontal pieces of joint tape unless you have a layer of joint compound between the two tape layers.
Next, apply texture. You can use joint compound in any of several patterns with trowels and joint knives for a plaster-like look, or you can spray-apply the texture.

You can buy joint compound in a box at your home improvement center. I load the compound directly into a mud tray and add a little water as needed for the right consistency.
The two most popular spray-on textures are orange peel and knock-down finish (see “Putting up Knockdown Texture” at www.extremehowto.com). Both of these textures can be applied with a hopper spray gun.
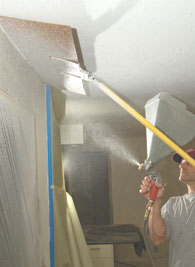
Make sure everything is well masked off and drop cloths are in place before loading up the texture hopper. I have a helper man the shields for areas near the ceiling.
For small patch jobs, you can get texture in an aerosol can or you can use a stiff-bristle brush loaded with joint compound. Load the brush with compound, turn the brush bristles upward and place it about 8 inches from the wall. Drag your fingers over the tips of the bristles to spring load them so they rebound and shoot texture on the wall. Practice this brush technique on some scrap first. Experiment with different thicknesses of joint compound to get the desired results.

We use this Wal-Board texture-pro hopper gun for our drywall repair. Air compressor requirements include 7 CFM at 25 psi for sustained use, but a smaller compressor can do a small repair job.
Most drywall repair is doable for the adventuresome do-it-yourselfer. Basic tools and supplies for drywall work are inexpensive, water cleanup is the order of the day, and most mishaps can be fixed with a little sanding and more joint compound. Don’t be scared, get out there and fling some mud!
