

By Blair Weilnau
A welding machine offers endless possibilities to your DIY needs, without being a burden on your wallet. Does your broken lawnmower need repair? Do you need to fix your metal trellis or gate? Would you like to build your own smoker or fire pit? Not only can you repair broken equipment but also be able to design and create your own sculptures, garden art or furniture pieces that will last a lifetime.
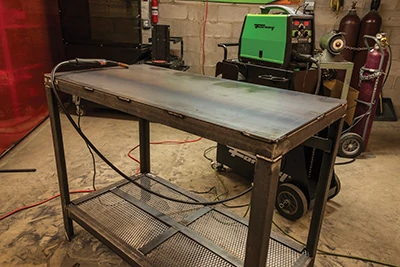
In addition to the basics, every welder needs a welding table to help them get started. It’s an essential piece of being a successful welder and offers many benefits. A metal table allows you to easily ground your work and is sturdy enough to handle the toughest welding jobs – plus, it’s easy to make on your own.
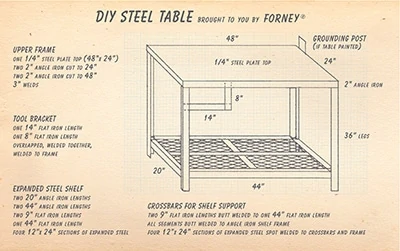
Here at Forney Industries, we needed a new welding table for our service area. We began by sketching out our metal table idea. We decided our table would be 3-feet tall, by 4-feet long and 2-feet wide.
Tools & Materials
 We gathered all the tools needed for this project which included:
- 190 MP welding machine (in the 2T trigger mode, MIG option, CAT# 324)
- .030-in. MIG wire (CAT# 42286),
- 700 P plasma cutter (CAT# 303) or a reciprocating saw
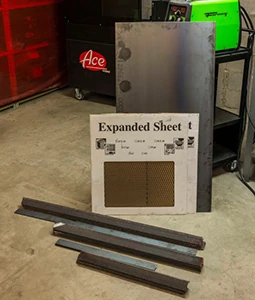
- expanded metal (CAT# 49613)
- 2-in. wide and 1/4-in. thick steel (angle iron and flat iron)
- 1/4-in. thick steel plate
- angle grinder with grinding and cutting discs
- chop saw
- heavy-duty magnets
- C-clamps
- welding helmet, safety glasses, welding gloves and fire-resistant jacket/apron.
Project Prep
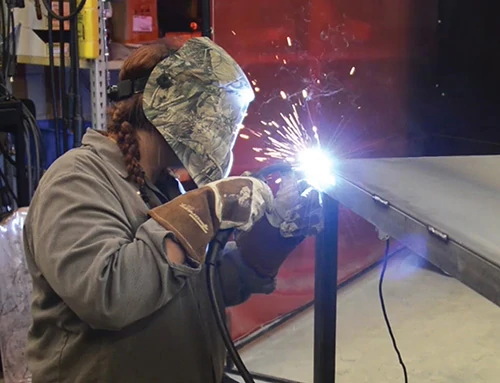
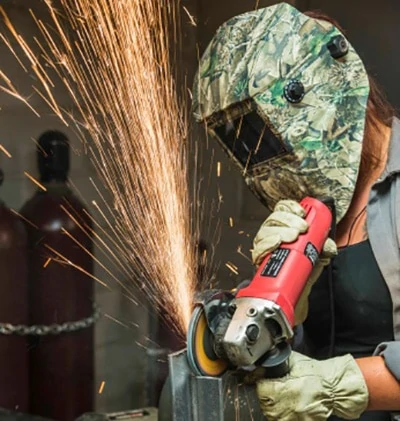
Safety is paramount. Please remember your eye protection or welding helmet when grinding, cutting or welding. Also, a fire-resistant jacket or apron should be worn to protect your clothes and body along with work gloves and welding gloves when appropriate.
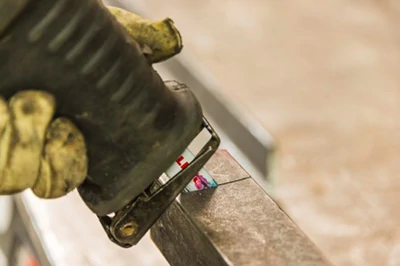
The first step is to cut all angle iron, flat iron and expanded metal to your desired length. We started with the frame of the tabletop. Using our Forney 700 P plasma cutter, we cut angle iron into two 4-ft. pieces for the length and two 2-ft. pieces for the width. Next, we cut the angle iron into four 3-ft. pieces for the legs.

The expanded metal will be used for the bottom shelf. We started with a 24-by-24-in. piece and cut it in half. Each 12-by-24-in. piece will fit a quarter of the bottom shelf and will be supported with flat iron. Using an angle grinder with a Type 27 cut-off wheel (Forney CAT# 71801), cut through the expanded metal.
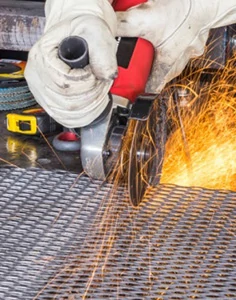
Pro tip—Use a clamp or heavy-duty magnet to help hold the expanded metal in place while you make your cuts.
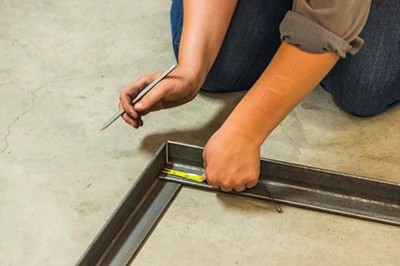
On the two 2-ft. pieces of angle iron for the table top frame, cut out a section of the corners so the 4-ft. pieces of angle iron can rest inside of it. You will eventually weld these pieces together. We used a reciprocating saw to cut these small pieces. Grind down the edges if they don’t match up; you want them to fit flush together. Remember to square up these pieces and ensure they create a 90-deg. angle; this will help the table maintain its rectangular shape.
If you notice that the edges don’t meet exactly, grind them down rather than re-cutting. Grinding is easier and will help you get a snug fit. If you have a large piece that needs to be removed, revert back to your plasma cutter or reciprocating saw.
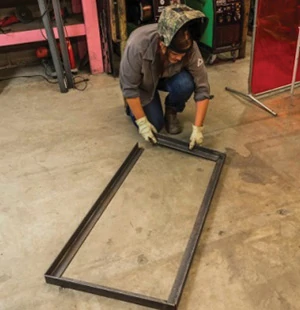
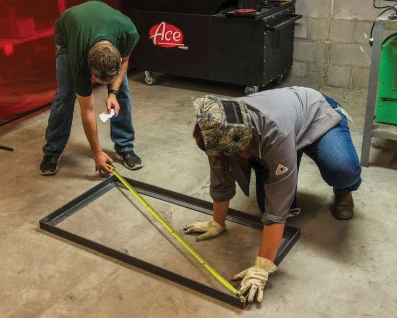
Arrange your pieces on the ground and make sure everything lines up and fits together well. We took measurements at this point to make sure the top was square and even, as this is the foundation for the rest of the table.
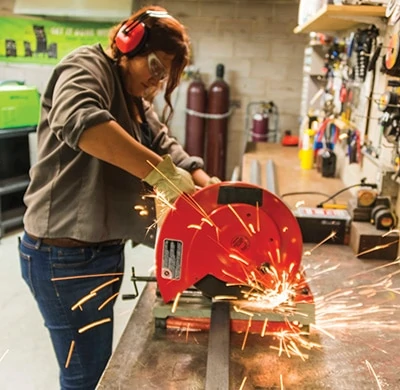
Cut the flat steel pieces for the shelf. One piece should be 4-ft. in length and there should be two 1-ft. pieces. We used a chop saw with a 14-in. Type 1 cutting wheel (Forney CAT# 71874) to cut the flat steel.
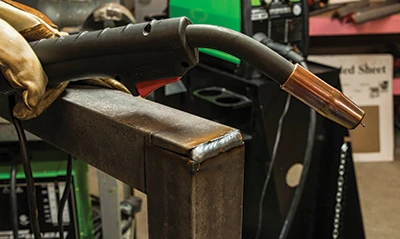
Get your machine ready to weld. The machine we used was a 190 multi-processor unit (CAT# 324). We set the machine to 45 amps, 19.2 volts and put it in 2T trigger mode. We used .030-in. MIG wire (CAT# 42286).
Step-by-step Assembly
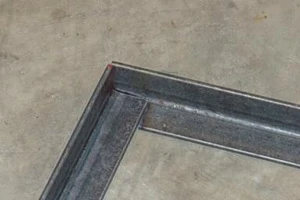
To begin, you’re going to weld the frame of the top piece together. Ground your clamp to the workpiece. This ensures the welder is ready to strike an arc. Use tack welds to secure your pieces together. Tack welding temporarily holds the pieces together.
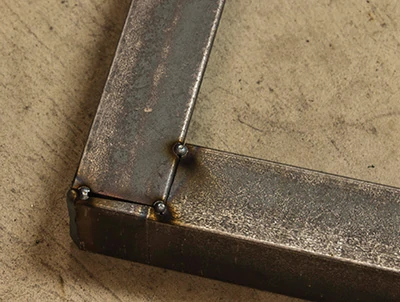
Start by welding along the edges/corners. Once you confirm the frame is square and even, seal up the rest of the gaps.
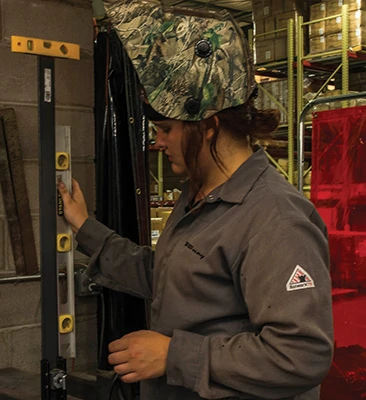
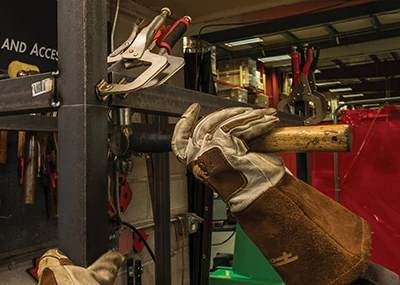
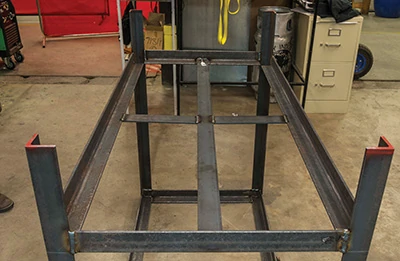
Next, weld the legs onto the frame (four 3-foot pieces of angle iron). We put the tabletop frame on a flat surface and used heavy-duty magnets to keep the legs in place. If you don’t have heavy-duty magnets, use C-clamps. The benefits of using heavy-duty magnets are that they offer a stronger hold while C-clamps can get in the way or move if you accidentally bump them. Complete one leg at a time and don’t try to secure all legs at once. We used a level to make sure the legs sat flush to the frame and used tack welds to secure the legs in place. Weld the legs in place after leveling and tack welding is complete.
Next, add a bottom shelf to hold welders, tools, cords, etc. The shelf will be made from expanded metal, and the shelf frame will be made from angle iron. The cut angle iron measures 2-in. wide by 20-in. long and is 1/4-in. thick. We used C-clamps to hold the angle iron 9 inches from the bottom. We leveled the pieces and tack welded them to the legs.
Pro tip—If your shelf isn’t level, instead of taking off the clamps and repositioning, try using a hammer to move the metal up or down until it’s where you need.
After securing the shelf frame with tack welds, move the table to the floor and begin welding. Moving the table to the floor will give you more space to complete your welds.
Pro tip—We used a ratchet strap to help square the table and to close the gap between the legs and shelf. When welding, the heat can easily move your pieces; a ratchet strap will help keep everything in place and pull the legs together.
Add support cross bars for the shelf with flat steel (one 4-ft. piece and two 1-ft. pieces). Use a C-clamp to hold them in place, tack weld each side and secure the pieces to the shelf frame.
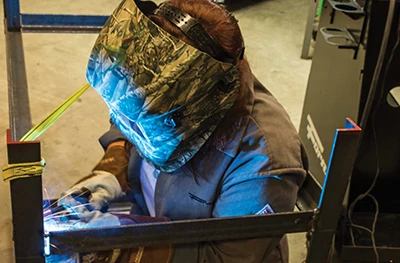
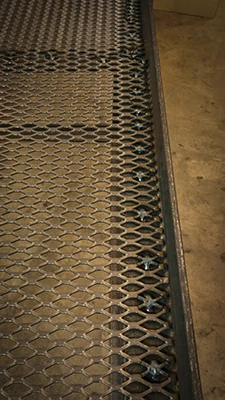
Take each 12-by-24-in. piece of expanded metal and spot weld it to the angle iron and flat iron pieces. A spot weld is more secure than a tack weld and is sufficient enough to fuse metal together for prolonged use. Spot welding will also help prevent burn-through, which is caused by applying too much heat and burning a hole or gap in the metal. If you try to run a long bead, the expanded metal will get too hot. Spot weld the expanded metal on the bottom side of the table for a cleaner look. Use a metal weight or a heavy object to add pressure to the expanded metal so it’s easier to spot weld.
Pro tip—Since you’re welding on 1/4-in. steel, always start your welds on the 1/2-in. angle iron to prevent burn-through and work your puddle up.
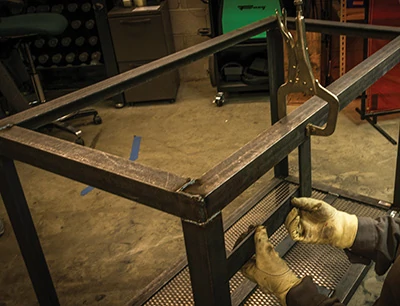
We wanted to add a 90-deg. angle below the tabletop frame so we can hang our angle grinders. We measured one 14-in. piece and one 8-in. piece of 2-in. wide flat steel, clamped them in place with a C-clamp and welded them to the angle iron.
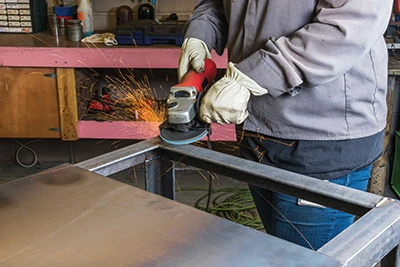
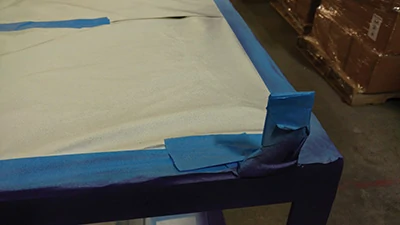
Finally, get ready to assemble the 1/4-in. steel plate to the top frame. You’re going to clean and prep the steel plate with denatured alcohol to ensure a cleaner, more structurally sound weld. Using an angle grinder with a grinding wheel (CAT# 71987), grind down the welds that are on top of the frame to ensure the steel plate will sit flush.
Line up the steel plate and fuse it to the frame with 3-in. welds across the edges. Doing smaller 3-in. welds will keep the table aligned and prevent warping. If you do a continuous line, the heat will warp the table and you will end up with an uneven base. You can leave the 3-in. welds as is, or go back and fill in the gaps.
You can also grind down the edges or leave them to display your great work.
Finally, add a post to the edge of your table so you can easily ground your future workpieces.
If you decide to paint your table, however, remember do not paint the ground post. Painted metal will not ground.

Finish the table with paint or by polishing the table top to get the customized look you desire. The final result will be a working, sturdy table that will not only hold and store your welder and welding supplies, but assist you with future welding projects.
Editor’s note: Blair Weilnau is copywriter at Forney Industries.
Side Note
Get Into Welding
Learning to weld is relatively simple and inexpensive with the right equipment and gear. Start by choosing the best welding machine to suit your needs and invest in the proper personal protective equipment (PPE). Suitable PPE includes: a welding helmet, fire-resistant coverings, welding gloves and safety glasses. You will also need the correct filler metal, which refers to electrodes or wire depending on your machine. A few nice additions that will help clean up your welding projects are: wire brush, slag hammer, angle grinder and flap discs. Also, MIG pliers, C-clamps and heavy-duty magnets are helpful.
Implementing the fundamentals is easy by watching online tutorials and/or taking welding classes at your local community college. Alternatively, if you know someone in the welding profession, spend some time with them to learn the basics. You can learn a lot about welding in a few hours. Then, with some practice, you will be welding in no time.
For beginners or the DIY enthusiast, you can get into welding for approximately $300; for the more advanced DIY or farmer/rancher welder, you can spend closer to $1,000. The possibilities are endless with the right welding equipment and your creativity.
