


Forget string and batter boards. Use the deck’s bandboards—and a cantilever beam—for fast layout and framing.
I’m a big fan of anything that saves me time and increases quality. The first backyard decks and front porches I laid out were the standard affair of strings pulled from the foundation, tied to stakes, and criss-crossed all over the place so I could locate and dig post holes before setting them and framing the deck on top. Now I do it reverse order. I make more money and have much more dependable control points for framing.
Frame a “U”
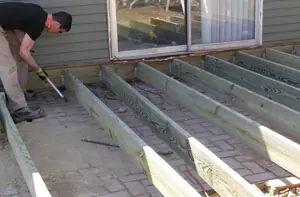
In this system, all the reference points for locating structural deck parts like posts and joist length start with the ledger and band joists. Build three sides of the deck perimeter (ledger and left and right band joists) in the air. Temporarily support them on 2-by-4’s, (strongbacked if the deck is higher than 6 feet). If the project is huge or multi-leveled, I use the same method. I just frame it in smaller, more manageable sections. And, you must remove the siding on the building and flash the penetration properly to prevent leaks.
Ledger, Part 1
It all starts with the ledger. Set it to the right height, cut it the right length, then lay it out for joists. Here’s how:
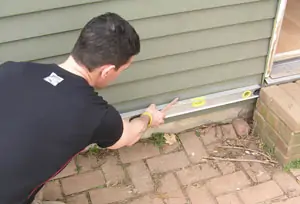
Determine the ledger’s exact location on the building. I want my finished deck height flush with any doors so egress to and from the house is seamless, so I use the lowest point of the lowest door as my control point for layout. Then, I subtract the thickness of the decking, plus 1/8 inch. In the case of the Lowes ChoiceDek to be used on this project, that’s 1-3/8 inch.
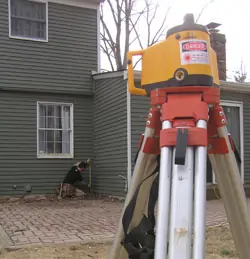
Next, I transfer a level line that indicates the top of the ledger around the building. For short runs a level works, but for longer runs, a laser level is the way to go. Cut the ledger to the overall width of the deck.
Flashing
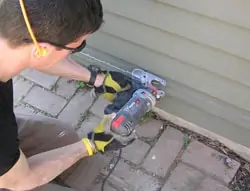
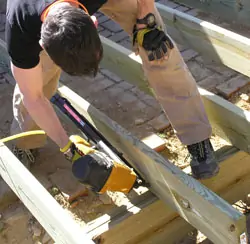
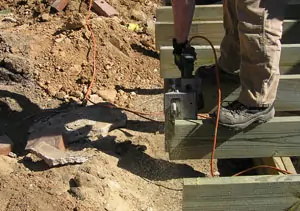
Remove the siding just above the ledger layout line. For the aluminum siding here, I used RotoZips’s new metal cutting bit and it blew anything I could do with snips out of the water. Flashing details may vary by area, but the key here is not to skip this part. Many deck failures can be traced back to improperly detailed ledgers that fail, not to mention sill-rotting leaks.
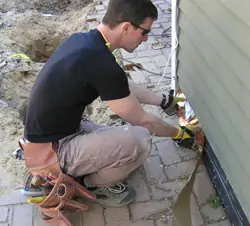
I use a belt-and-suspenders approach to flashing a deck ledger. After the sheathing is exposed, I tuck Grace Ice and Water Shield up under the siding, and then stick it on so there is an impermeable barrier behind the ledger—one that seals around penetrations like lag screws and nails.

Next, I use Phenoseal caulk to seal under any gaps under doors that inegrate with the flashing.
Finally, I install copper flashing. That also gets tucked under the siding, an eventually folded over the ledger. Do not use aluminum. Aluminum does not get along with the copper in the new treated-wood formula, and together they make the recipe for a leak.
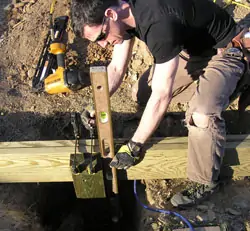
Ledger, Part 2
Now back to the ledger board.
Lay it out for joists and bolts. Make sure no joist—or joist hangers—interfere with a bolt location. The ChoiceDek decking boards to be used for this project call for 16-inch centers.
Cut 1-1/2 inches off each side of the ledger board—do not cut 3 inches off one end. Cutting the ledger like this enables you to face-nail the left and right band joist to the ledger while maintaining the same control points for layout that you’ll need later.
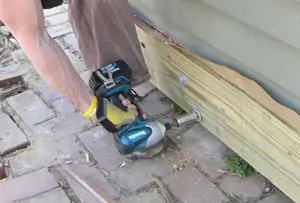
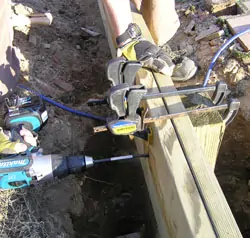
Install the ledger on the line. I use 1/2-inch-by-6-inch double hot-dipped galvanized lag screws, but there are new ledger screws available that I’ll use on my next decks from Timberlock and GRK. You can use a ratchet or wrench to install the bolts, but why? An impact driver will zoom them home nicely.
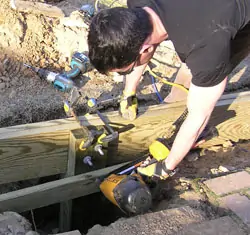
Band Joists
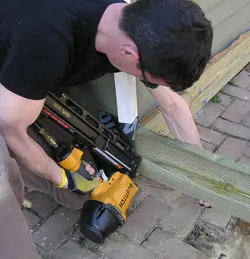
Determine and cut the band joists to their finish length. Shoot one face nail through the top of each band joist into the ledger. Eyeball it so that it’s square to the building, then have someone at the far-end of the board level it.
Once in position, tack each band in place on a temporary 2-by post. I set the temporary post 24 inches back from the end of the joist and plumb to the ground. Repeat for both sides. Last, square the band joists and ledger. Pulling a 3-4-5 or 6-8-10 triangle works. Once in place, tack a diagonal from the ledger to the band to hold it.
Post and Beam
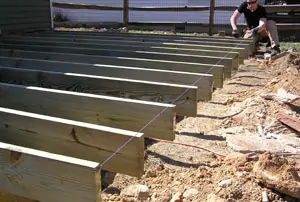
A double 2-by-10 cantilever beam—or “carrying” beam—is the secret to this system. It’s what supports the joists from below and enables you to frame the sundeck without poured footings. A double 2-by-10 is code where I build. If the deck is wide enough that I have to splice the beam, I place any breaks centered over a 6-by-6 post. Posts are called for at 6-foot centers, starting 24-inches in from the left and right sides. The length of the beam is 3 inches longer than the ledger—the same as the overall width of the deck. Clipping 45’s off the bottom of the beam refines the look. If you want to get fancy, cut an inside radius with a jigsaw.
Hoist the beam tight to the bottoms of each band joist. Get it flush to the front edge of the temporary 2-by-4. Sink three nails through the temporary 2-by into the end of the beam. Next, pop toe-nails through each band into the beam.
Now you can use the carrying beam to lay out the post locations. Use a level or plumb bob and locate where to dig. Without a front band on the deck, there’s usually ample working room for shovels, a power auger, or one of my favorite deck-building tools—a Skidster, which I’ll rent with an auger and/or bucket or forks for large projects. For hand digging, it’s much easier to dig square holes than round. I use a garden edger, shovel and digging bar to dig square holes (16 inches by 16 inches). I dig them wider than required, too. This makes for wiggle room in the holes so I can get the post dead plumb. Finally, for a patio deck like this one here, installing the doubled beam now just gets in the way. Instead, pull a string between the temporary posts and mark your holes. Dig the holes, and then install the beam.

Next, use a circ saw and recip saw to cut a 3-by-9-1/2-inch shoulder at the top of each post to carry the load.
Then, measure for post length using the bottom of the beam as the control point. Measure from the beam-bottom into the holes’ bottoms. On the post, pull your tape from the shoulder cut to the bottom of the post and subtract an inch. If you use pier footing forms, figure out the tube’s finish height (including post anchor) then cut the post accordingly.

Bridging
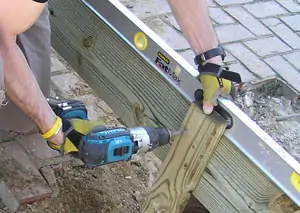
The next big key to this system is cutting bridging from 2-by stock. I use two pieces of 2-by for each hole, at least 3 feet long each. Place each post in a hole. Lift it up to the beam with the long side of the notch behind the beam. Drive four toe-nails through the post into the beam. Next, clamp it in place. A helper is a good idea here. You can do it alone, but it is a circus of ingenuity to get right.
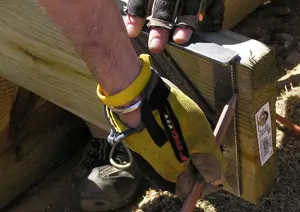
Plumb all four faces of the post, then place the bridging blocks across the holes and nail them to the posts. Before you nail the block, smash it down with your hammer to compress the ground, especially if the ground is wet. The next step is to drill two 5/8-inch holes for 1/2-inch-by-8-inch hot-dipped galvanized carriage bolts, then set them snug—but not tight. Before you sock the carriage bolts tight re-check the posts for plumb. Tighten until the bolt head crunches the face of the 2-by-10.
Joists
Now it’s time to lay the beam out for joists. Pull your tape measure from the end of the beam in the same direction from which you laid out the ledger, marking joist locations. Note: Had you not trimmed 1-1/2 inches off each end of the ledger, your layout would be off at this stage. Next, I nail joist hangers on the joist ends. Then, one at a time, I ride them over the beam and nail them on layout to the ledger. Secure the joists by toe-nailing each side of each joist into the beam. It’s important to note that you don’t cut any joists (other than the left and right band joists already cut to length) before installing them.
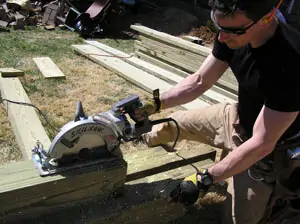
Gang Cutting
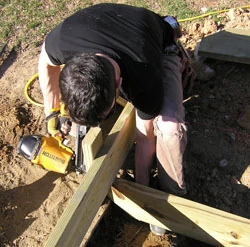
It’s much easier and more accurate to cut joists to their finished length after they’re set on the beam. To do this, snap a line from the end of each band joist on the tops of the new joists. Mark a line using a speed square down from the chalk line, then cut each joist—a worm-drive saw works great in this application. Lastly, face-nail the front band on the joists. Note: like the beam, on a low deck like the one shown here, installing the front band may restrict access to the holes for pouring concrete. Just leave it off until the concrete is poured in the footings, cured, and the holes backfilled.

Good to Go
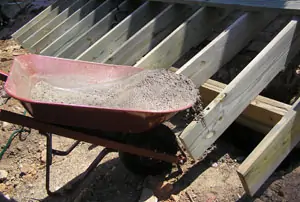
Now the frame is up, and you’re ready to install the decking. More importantly, however, you’re ready to call in your footing inspection. My building department requires at least 24 hours before sending an inspector, so framing like this lets me get started and be reasonably certain that footings are good to go when the inspector arrives. And I can either fix problems he finds easily, or I’m staged to pour concrete, which I pour out of a wheelbarrow. Or, I can move forward with decking and handrails. I can also postpone calling for the inspection if it rains cats and dogs, or if there are problems—like soil better suited for a jackhammer than a shovel.
Editor’s Note: Mark Clement is the author of The Carpenter’s Notebook – Find out more at www.TheCarpentersNotebook.com
