

So, you’ve noticed your window isn’t there anymore, and Mother Nature is being more intimate with you. Maybe your stereo is missing, or pieces of trash are floating in during your commute. You probably need to check out the cost of window-glass replacement. I called one auto-glass repair business, but didn’t like the amount they would charge to fix the problem. A bit more research via the Net and I not only got a market price for a replacement window (one-third what the “professional” wanted), but also found a nearby auto-recycling center with one in stock.
Preparation
Make sure you have a good selection of hand tools, a tarp, a repair manual and a vacuum. Follow the instructions in your specific repair manual to remove the door panel. You should find a plastic sheet/weather barrier under the panel. Carefully peel this sheet back while avoiding the sticky stuff. Use gloves to remove any hunks of glass that might still be together — window tinting will cause that. Use a shop vacuum to get the rest of the cubits out and carefully dispose in the trash.
Zen
Now, relax with a cup of Wild Sweet Orange Herbal tea. After you’re done with that, wash the replacement glass. Marvel at how glass is just sand, only different. Do some finger stretches. Next, take the 2-foot square piece of glass (with a slight bend in it) and fit it into the door through the 2-inch wide slot at the top. Notice how a third or fourth extra hand might be useful. I was stumped at first, but when I stepped back and looked at things, I noticed a couple of bolt heads in my door panel. They held a support post for my vent window in place. Once I unbolted them and pushed the post forward, I had enough room to maneuver the glass down into the channel. Success! Follow your manual and you shouldn’t have many problems. Remember that glass doesn’t like to bend. Find comfort in the fact that the factory got the original piece of glass in there, so you should be able to do it too.
Battening Down
The repair manual shows you the placement of the bracket and clips that were bonded to the glass. With the top piece of weatherstripping back in place, make sure the glass is aligned. Does it raise and lower without binding? Great. Snug down the bracket bolts; replace the weatherstripping and barrier sheet. Get the door panel back on and align the window crank lever, if you have one. Mine no longer brushes against my knee when the window’s all the way down.
Finally, you can enjoy not having things so easily stolen from your truck. Go to the car wash again. Celebrate the power of sand — without all the dirt and debris.
Step 1: Things you’ll need: a tarp to help in the cleanup, a variety of common tools and a repair manual.
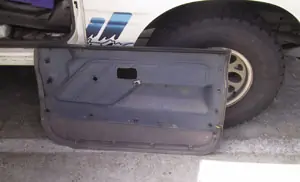
Step 2: Your mileage may vary, but most panels have lots of snaps and screws. Gentle pressure, patience and a manual will help you peel the panel off the door.
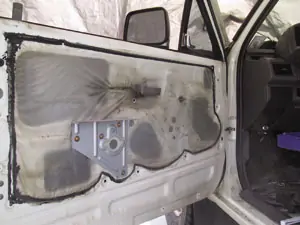
Step 3: Once you’re inside the door panel, gently remove the weatherproofing sheet. Beware the black sticky stuff.
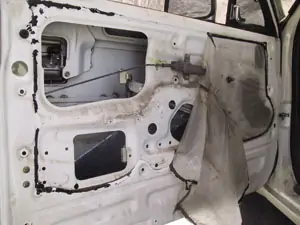
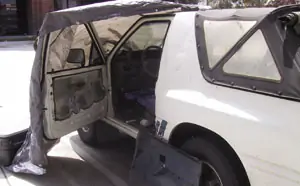
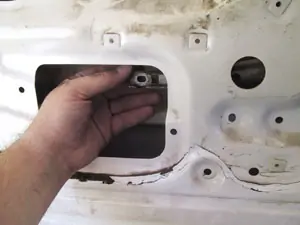
Step 4: With the weatherproofing removed, various access points are revealed. Notice the lift mechanism, bracket and clips.

Step 5: The white clip should be supporting a pane of glass. It’s not, but it will.
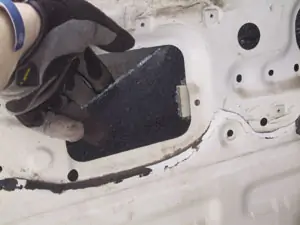
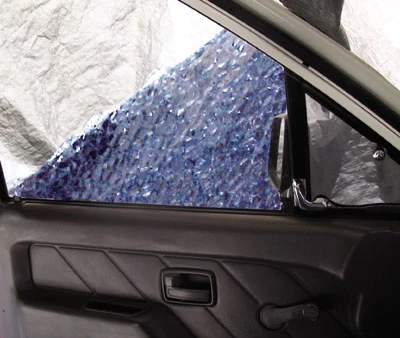
Step 6: Be careful when removing the remnants of the pane. I suggest gloves. This shows how a tinted window ends up when broken.

Step 7: Use a shop vacuum to keep things sharp and professional. Take your time to get all the pieces out.
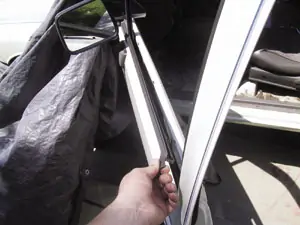
Step 8: The weatherstripping needs to be removed so you can slide the new piece of glass into the door. Another instance where gentle patience will help you keep things nice and unbent.
Step 9: Remove the clips so that you can attach the new glass/clips onto the lifting arm’s bracket. Make sure the bolts are snug, but not so tight as to crack the new glass.
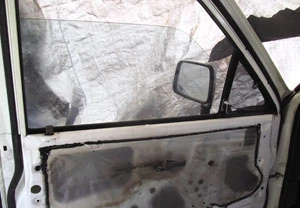
Step 10: Make sure the glass moves smoothly, without any snags. Replace the weatherproofing and reattach the door panel.
