

Get the Look of Traditional Tile with the Easy Installation of Adhesive Vinyl.
By Matt Weber
Fool your friends and neighbors with stick-down tile that has the appearance of genuine stone. With careful planning and grouted joints, you can install a new vinyl floor with a classic look much faster and easier than using thinset mortar and ceramic or stone tile.
This project was inspired by a friend of mine with a pet husky named Niko who had been mistakenly locked in the bathroom. My friend went to work, and Niko awoke from his nap in a panic. He tried to dig his way out of the room, right through the existing resilient flooring. By the time he was discovered Niko had destroyed half the floor. It was high time for replacement (the floor, not the dog), and we decided on the vinyl tile installation detailed here.
Prep & Materials
For this type of flooring, I suggest choosing adhesive-backed vinyl tile from a reputable manufacturer. Cheaper stick-down tiles usually have inferior adhesive, and the last thing you want are tiles that don’t bond to the subfloor.
For grout, I use a ready-to-use, premixed sanded acrylic grout that is formulated for use with vinyl tile.
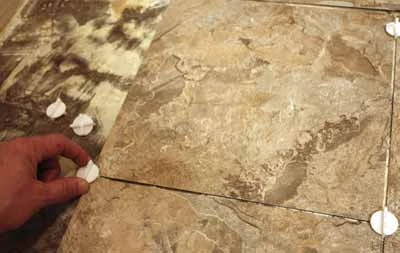
Pick up a bag of plastic tiles spacers, too, which help keep all the joints the same size. Tile spacers come in different sizes, and the size is up to you. My personal opinion is that smaller is better, because it provides less grout surface to collect dirt and grime. We chose spacers small enough for 1/8-in. joints.
In our situation we had to remove the existing flooring and old adhesive. This leaves a residue on the floor, so to ensure a solid bond for the new flooring we primed the subfloor. To do this, buy a bottle of Multipurpose Floor Primer.
The day prior to installing the floor, move the vinyl tiles into the room where they’ll be installed and leave them overnight. This allows the vinyl to warm to room temperature and become less brittle for installation.
Subfloor
Poor ol’ Niko had given me a jump on removing the old flooring, but there was still plenty of stubborn sheet vinyl between myself and the subfloor.
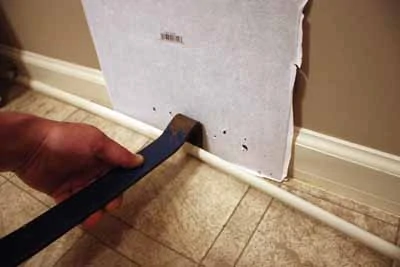
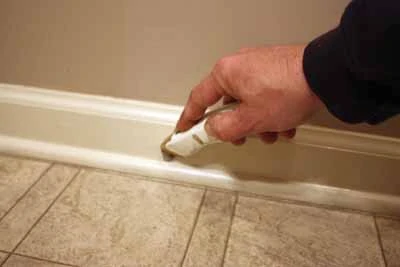
First, I took off the shoe molding. To prevent paint peeling off the base molding, which I wanted left intact, I ran a utility knife along the caulk line between the base and the shoe. The shoe molding then comes off with a pry bar. I used a piece of vinyl tile to protect the base molding when prying.

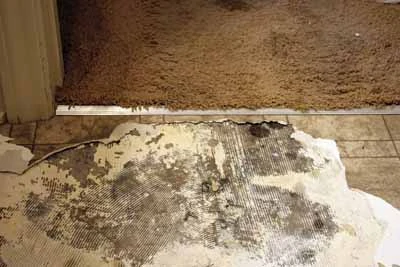
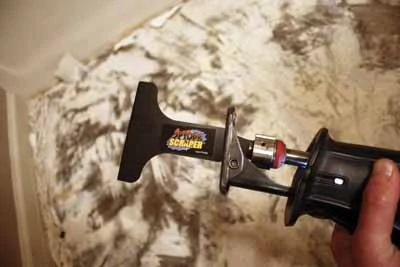
A hand scraper can be used to remove the old flooring and glue from the slab. I highly suggest, however, that you invest in scraper blades that fit into a reciprocating saw. You’ll also want more than one; we went through three on this small floor. But these time-saving attachments not only fly through demolition faster than you could do by hand, but they spare lots of wear and tear on your joints and knees.
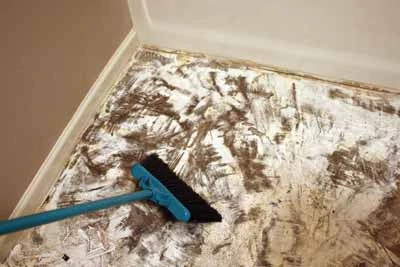
Once the old vinyl and stubborn adhesive were stripped away, I swept the floor several times and even wiped over it with a damp cloth to remove all loose particles and ensure the floor was absolutely smooth. Any small pebbles or grit can show through the new vinyl tile as a visible bump, so it’s important to be thorough. The subfloor must be absolutely smooth and level.
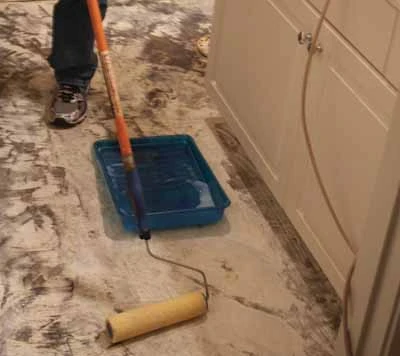
Because of the old adhesive residue, I coated the subfloor with Multipurpose Primer from TEC Skill Set using a long-handled paint roller. Allow the primer to dry according to the manufacturer’s instructions.
Layout
I suggest dry-laying a cross-pattern of paper-backed tiles across the floor in the center of the room. Run a full course of tiles in both directions. Look at the tiles at the ends of each course. Is there space for a full tile at the perimeter, or only a partial sliver? To eliminate the small “sliver tiles”, shift the cross pattern from left to right and front to back until the end tiles fit appropriately. Consider where floor fixtures and room corners will intersect the tile lay-out. Also, consider placement of the tiles in the doorway of the room. Most homeowners prefer a full tile in the middle of the entrance, if possible.
When it comes to vinyl tiles that mimic the look of natural stone, there’s another aspect of layout to consider: Pattern placement. Unlike natural materials that have unique grains and colors, the manufactured tiles will have repeating patterns in the product line. If you put two of these identical tiles next to each other, the floor will look less like natural stone because two identical tiles would never come from a quarry. Therefore you should take time to position these recurring styles strategically in your layout, slotting dissimilar tiles between them and turning them 90 degrees so the eye doesn’t pick up on the repeating patterns. This is most easily done by laying the whole floor out dry.
Installation
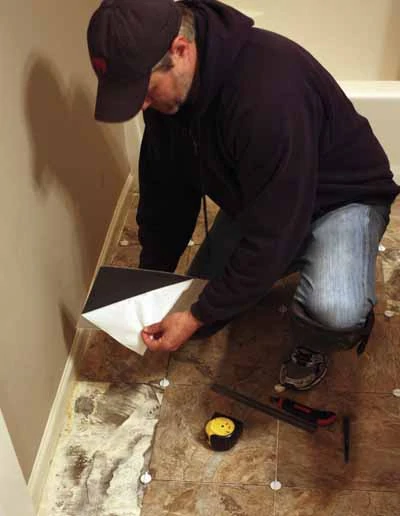
Once you’ve determined your layout, you can remove the paper from the tiles and install the cross-pattern tiles in place, one by one. Don’t forget to use tile spacers between every joint. Fill in one quadrant of the cross pattern at a time. Press down the installed tiles with your body weight to ensure firm adhesion. Using a roller also helps.
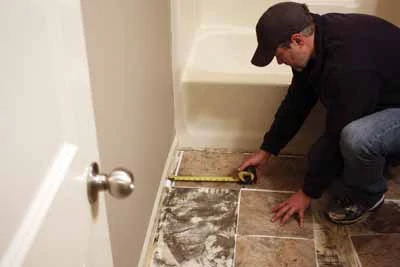
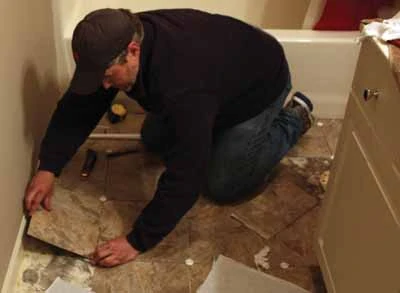
Tiles at the end of the row will have to be fitted. Place the tile to be trimmed over the last full tile, flush with all four edges. Place another full tile against the wall and mark a cut line where the tiles overlap.
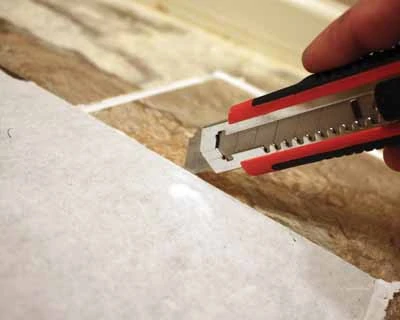
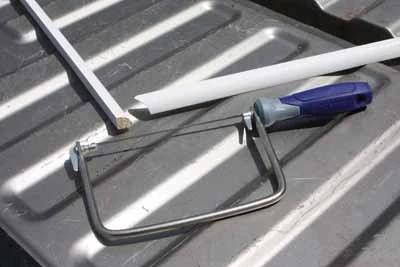
Unlike ceramic or stone, no heavy-duty power tools are required to cut vinyl tile. All you need is a sharp utility knife and a straight edge. To fit around obstacles, make a pattern on paper or cardboard, trace its outline on the tile and cut to shape.
Grout
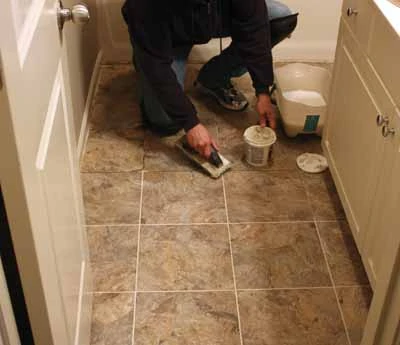
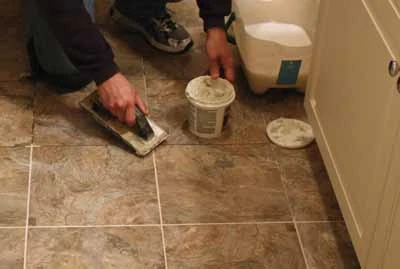
With the tiles firmly in place, grout the joints as you would any other tile installation.
Holding a sharp-edged, rubber grout float at a 45-degree angle to the joint, spread the grout diagonally, and pressing firmly to ensure the joint is completely filled. Then, holding the float at a 90-degree angle, pull diagonally across the joint to remove excess grout, using the edge like a squeegee. The angled stroke helps prevent the float from digging into the filled joints and pulling out the grout.

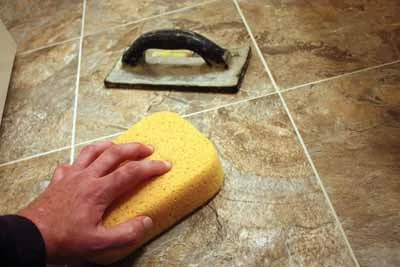
For best results, remove the grout haze as you work, using a sponge and a 5-gallon bucket of water. Just wipe up the grout film, rinse the sponge clean, wring it until damp and repeat. Lightly work the sponge in a circular motion, loosening grout residue while making the joints smooth. Change the water often. Check the work as you clean, and repair any low spots with additional grout.
Protect the finished surface from traffic for at least 24 hours of drying, and then use a sponge and water to remove the final remaining grout haze. I recommend sealing the grout after 72 hours to make the joints easier to clean.
Finishing up
The baseboards remained in place throughout the project, and I installed new shoe-molding to cover the edges of the tiles along the perimeter. I completed the job by caulking the joints and applying touch-up paint. Because a bathroom is a steamy environment prone to moisture exposure, be sure to choose a caulk specified for kitchens and bathrooms and formulated to fight mildew.
In a single day, I got the old floor torn out, the new floor installed and I was home in time for supper. Grouted vinyl floor tile offers three big selling points; it’s inexpensive, it’s easy to install, and the finished project looks excellent.
