

By Larry Walton
Versatile modular cabinets for your stuff.
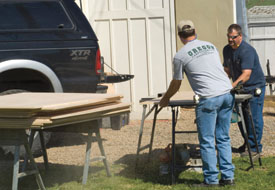
I used the promise of some good food to entice my bachelor brother to come down and help me with a cabinet project. He somehow got the idea that there would also be a golf outing. He should have known better; we were embarking on a home improvement project, which involves some cool power tools, but very rarely the use of golf equipment.
Before my brother, Chad, arrived I drew up a set of plans. It’s important to have a detailed set of plans so you have something from which to deviate. Also, it helps to get your volunteers on the same page.
What the family needed was a way to store some of our stuff. The place we were moving into had a one-car, detached garage known in this area as a carriage house. Large double doors, in keeping with the historic district, were not conducive to daily use for car parking, so we planned to use the garage as a storage room. (It’s one thing to begin piling stuff until you can’t fit a car in the garage, but we planned to never park the car there in the first place.)
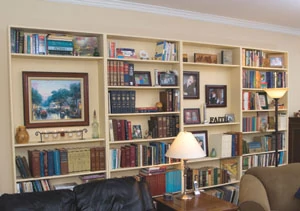
This project can also apply to those who want to add storage in one of multiple garage bays, sheds or any size room where you want to build closet and/or shelving space without building a closet. The design can be used for book shelves, food storage, wardrobe closets—you name it.

The biggest advantage to this project is that the cabinets are designed to be completely modular and portable. You can take them with you when you move or reconfigure them for use in different rooms as your needs change. In fact, as of this writing I’m planning to add a face frame and doors to one of the 24-inch units and use it in our bedroom as a wardrobe closet.
With plan in hand, we were able to calculate the materials needed, which in our case turned out to be one heck of a lot of plywood. Good thing we have a family member working in the plywood industry. When drawing up plans, it’s a good idea to sketch out a 4-by-8 sheet to scale and divide it up to represent parts (top, bottom, side, back, shelves) so you can see how to best use the material.
We wanted the vertical and horizontal dimensions of all of our cabinets to match, but with a variety of depths (12, 16 and 24 inches). In the end we made all of the units 32 inches wide by 84 inches tall. The 7-foot height would allow them to be used in rooms with 8-foot ceilings. It could be brought in and still tipped up with the toe kick removed. As for width, 32 inches would make a reasonable span for almost any weight of object we would store on the plywood shelves. We built five units that were 16 inches deep, two units that were 12 inches deep and two units that were 24 inches deep.
Prototype
Anytime you’re going to build multiple units and especially when they share identical parts, it’s a good idea to build a prototype early in the process. No matter how carefully you’ve planned, it’s easy to miss some details.
One detail often missed is how the pieces overlap one another. In our case, we wanted the sides to overlap the top and the bottom of each cabinet to hide the veneer layers of the top (lid) and the bottom (floor). Because of this overlap, the tops and bottoms needed to be 1-1/2 inches shorter than the overall width of the cabinets.
Additionally, we wanted our cabinet backs to fit inside the box that made up the sides, the top and the bottom for the same veneer-hiding reason. This means that the back panel piece is the same width as the top and bottom pieces but 1-1/2 inches shorter than the side pieces.
Our prototype build helped us see that the shelves themselves were each slightly shorter than the top and the bottom because you need room to move them in and out. Additionally, they needed to be a full inch narrower than the top and the bottom piece because of the room that’s taken up by the back panel (3/4 inch) plus a desired 1/4-inch reveal (or set-back) to the front edge.

To avoid wasting material, we cut a foot off each sheet of plywood to make them 4-by-7 feet. By doing this initial cut, we were able to use the extra 1-by-4-foot pieces to make shelves and toe kicks. Had we started with full-length rips, we would have ended up with lots of little 12-by-12-, 16-by-12- and 24-by-12-inch scraps.
Unless you have a large commercial-grade table saw, you should cross-cut your plywood sheets with a circular saw. When using a circular saw on plywood, mark and cut the sheets from the back to avoid tear-out.
After cutting the 4-by-8 sheets to length, rip the various pieces to width. Flip the sheet of material end to end after two cuts so you’re starting fresh with the factory edge. Pay attention to the condition of the materials as you cut your pieces. Once you’ve ripped a stack of 12-, 16- and 24-inch deep side pieces, you can cut your tops and bottoms out of this material.

Job for a Jig
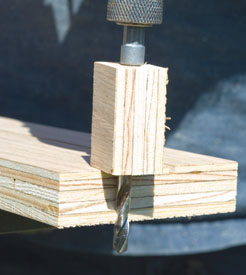
With all of the components cut for each of your cabinet units and before you nail them together into boxes, it’s time to make a layout jig to drill for adjustable shelves. We used a strip of 3/4-inch plywood as the layout jig. Chad, my brother, cut a shallow kerf down the strip for an alignment guide. He then marked 2-inch increments but not all the way to the end. Start at least 6 inches away from the top and the bottom of your jig unless you have a reason to place a shelf very close to the top or bottom.
The hole spacing on the jig does not have to be precise because the jig will ensure that the four holes for each shelf position will match each other. As long as the jig and the cabinet panel are flush when drilling, the holes will line up. Be sure to label the jig and the side panels, so when the cabinet is put together all of the holes will be spaced from the same starting point.
In addition to the layout jig for the hole spacing, Chad also made a depth gauge to fit on his drill bit. The depth gauge prevents you from drilling the holes all the way through the cabinet side panels. We sometimes use tape around the bit or mark it with a Sharpie. The important thing is that you drill deep enough for the shelf pegs, but not so deep as to exit the side of the cabinet panel.

With the side panels, tops, bottoms and back panels all cut to size and the side panels drilled for adjustable shelves, it was time to assemble the cabinet boxes. We did this by putting the back panels down on a flat surface and then arranging the sides and the tops around the outside of the back panel, paying particular attention to the direction of the side panels. I keep a little mantra running through my head to make sure the pieces overlap the right direction: “Verticals run by.” We nailed through the sides into the top and through the sides into the bottom.
We tacked the back panels in a few locations and finished nailing them off after rolling the cabinet up on one side and then the other.

Toe Kicks and Gussets
With the cabinet boxes all nailed together, it was time to turn our attention to the cabinet toe kicks. A toe kick can serve several different functions. First of all, it’s designed to get the cabinet box up off of the floor, away from brooms, mops, vacuum cleaners and small toys. Second, the toe kick allows for a space to park your toes when you approach a countertop work space or sink.
Toe kicks, when left loose, can help in the cabinet installation process. In situations where you are installing in a blind corner the toe kick can be leveled, and when the cabinet box is placed it will also be level.

Separate toe kicks allow added maneuverability for bringing an odd-shaped cabinet into a house. A cabinet that is near ceiling height cannot be tipped into position with a toe kick. However, with the toe kick off, you can bring it in, stand it up and place it on the toe kick.

Some kitchen base cabinets can make it through the door only with the toe kick off. This is often the case with kitchen corner cabinets housing lazy susans.

When it comes to the construction of a toe kick, there are a couple size considerations. The height is usually about 3 inches, which allows enough room for toes to fit under. The toe kick must be shallower than the cabinet—3 inches of set-back for base cabinets and less for shallow cabinets. A bookcase, for example, may be only 3/4-inch recessed to provide proper support.

The width of a toe kick can be flush with the cabinet box but often looks better with a 1/4-inch reveal, which means it will be the cabinet width minus 1/2 inch. We used this 1/2-inch rule because we wanted the sidewalls of our toe kick to nearly line up with the sidewalls of the cabinets to give it the best structural strength.
We mitered the corners of our toe kicks to hide the veneer layers of the plywood.

After building a prototype, we were ready to cut the toe kick parts in multiples, including triangle gussets to square corners and provide an anchor for attaching the toe kicks to cabinets. With the pieces cut, we nailed them together in an assembly-line fashion.

We used a drill bit with a built-in countersink to pre-drill a single hole in the middle of each one of the triangle gussets for all of the toe kicks. Because all of our cabinets had plenty of ceiling clearance, we were able to attach all of the toe kicks to the cabinet boxes. The toe kicks can be removed if we ever want to install them in an 8-foot ceiling location.
With the cabinet boxes all built, we cut the shelves. The shelves for the cabinets end up being slightly shorter than the top and bottom pieces for the cabinet boxes, and about an inch narrower than the top and bottom pieces. As always it’s a good idea to go ahead and cut one sample shelf and actually try it in position on the cabinet, with the cabinet shelf pegs in position to make sure that you have the clearance you need. If it’s too tight, then it’s hard to get in position and you can scratch up the inside of the cabinet box, possibly damaging the surface of the shelf. If it’s too short, then you’ll have too much gap between the shelf and the cabinet walls with a potential of the shelf falling off the cabinet pegs.
Got Rods?
We had two cabinet sizes that could be used for hanging clothes. The 16-inch deep cabinets function like partitions in a walk-in closet with the rod mounted 12 inches from the back. Another option is to use the 24-inch deep cabinets and make a full wardrobe with face frames and doors. Twenty-four inches is deep enough to hang clothes and have them be completely out of sight behind doors.
For now, we chose the 16-inch option to hang camo gear and winter coats in the carriage house. Either way, it’s simply a matter of getting some closet rod cups and installing them (about 2 inches down from the ceiling of the cabinet and approximately 12 inches from the back of the cabinet). With the rod cups installed, measure from the inside of one cup to the other, cut the closet rod to length and put it in position.
Here’s how our modular cabinets are currently deployed in the house:

Four of the cabinets are side-by-side and back to back to form a peninsula in the garage.
A second peninsula is made of two cabinets side by side with another forming an “L” at the end. This end cabinet stabilizes the narrow peninsula 16-inch cabinets.
Two of the cabinets are installed conventionally with backs against the wall.
One of them holds my golf clubs, which my brother says is wasted space if I never use them.
If you need to gain additional storage at your house, consider this modular cabinet approach. When choosing materials, think long-term. Each of these cabinets can move from room to room and house to house and be in service for generations.
Consider the Kerf
Consider the effects of the saw kerf when planning your cabinet sizes. If your plan calls for a cabinet that’s 12 inches deep, that would mean four rips out of a 4-by-8 sheet of plywood, right? Well, not necessarily. Keep in mind that each time you make a 12-inch rip on the table saw, you’re actually using up 12-3/16 inches because of the thickness of the teeth on the saw blade. By the time you get to that fourth piece, you may be 9/16 of an inch too narrow. So, make the depth of your cabinet pieces reflect the number of cuts that will be made out of a sheet of plywood. What you think of as being a 12-inch cabinet ends up being 11-3/4 inches net to accommodate for the saw kerf. Sometimes, however, the sheet goods are actually designed to allow for this type of cut. In our particular case, the plywood we had was actually 49 inches by 97 inches, which allowed us to go net 12, 16 and 24 inches for our cabinets.
Back Panel Advice
It’s much more common to use a thinner piece of material for a cabinet back panel for a couple of reasons. For example, thin plywood is less expensive and takes up less storage space on the interior of the cabinet.
However, there are advantages to using 3/4-inch thick material as the cabinet backs. Thick plywood eliminates the need to make rabbet cuts in the side, top and bottom panels. These are necessary for thin backs because they cannot be nailed through the edges. The thicker back panels allowed us to use the cabinets out in an open room as room dividers. Additionally, the use of 3/4-inch back panels meant we could eliminate cabinet strong-backs or cleats to anchor the cabinets to wall studs.
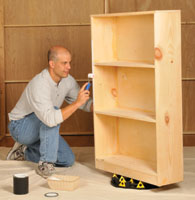
Edge Banding
Because most of our cabinets were in a garage application with no doors, we decided not to face-frame the cabinets at this time. We did have one cabinet slated for inside the house. Since this cabinet was not going to have doors, we decided to use matching hardwood strips to edge-band the front faces of the cabinet box and the shelves rather than building a face frame. We ripped strips on the table saw, cutting them to length, gluing them and nailing them into position. After each rip, we jointed the board with the power planer before making another rip. A full-sized jointer is the best tool for this operation.

Build a Mobile Tool Storage Cabinet with 5 Drawers That All Lock with One Key
Storage cabinets come in all shapes and sizes. Max Hunter, professional cabinet maker and president of Western Dovetail Inc., offers detailed instructions on the EHT website for a top-of-the-line wooden tool cabinet with casters and lockable drawers. Hunter’s cabinet has gone through the entire design, prototype and field-testing process to make it simple, sleek, practical, cost-effective and versatile. The article details step-by-step building instructions, tool and material requirements, cut lists and even cost estimates. To access this how-to story, visit www.extremehowto.com and click on Build a Mobile Tool Cabinet. And, visit Western Dovetail online at www.westerndovetail.com.
Finishing Turntable for Easy Cabinet Painting
The Finishing Turntable is a unique and versatile device that allows you to securely elevate and effortlessly rotate your woodworking projects. It consists of 12 Painter’s Pyramids mounted to the turntable surface on rails to allow tremendous flexibility in supporting craft projects. This combination of functions enables woodworkers to improve finishing results while saving time and effort. The table enables effortless and “touch free” access to all sides, which eliminates finishing imperfections resulting from contact with wet surfaces. The table grants access to the lower edges of projects to ensure more consistent and contaminant-free finishes. Using the table also prevents dents and scratches from moving projects in confined spaces. The Finishing Table is capable of supporting oversized projects that weigh up to 100 pounds.
