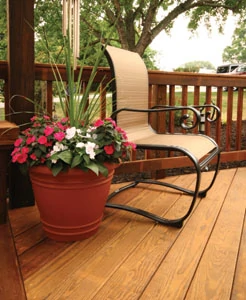
Decks are built for summertime, and now that the days are long and the sun is shining, EHT offers an overview of some critical construction techniques to make sure your next backyard project stands strong and steady.
Code Compliance
With a little research you’ll find a variety of methods to construct a deck, but deck construction must always conform to local building codes. Deck construction may also require a building permit. In general, building codes are developed by industry associations to provide minimum safety standards for a home’s occupants, the environment and the public at large. Building codes are adopted and enforced by local government officials and therefore vary based on local political issues, environmental regulations, etc. However, building codes are “not intended to preclude the use of other construction methods or materials. All construction and materials must be approved by the authority having jurisdiction” (2009 International Residential Code). In other words, if the local building official determines your method of construction meets or exceeds the safety and soundness of what is prescribed by the building code, then you’ll get the green light to start building. Check with your local building inspector to determine all local requirements and to clear up any questions you may have about the deck’s design.

Deck Layout
Establishing the layout of the deck simply involves outlining the size and shape of the deck using string and wood stakes. This step will determine where you will locate the supporting concrete piers and support posts. It may help to string off the perimeter of the deck, and then line up a second set of stakes and string inside the perimeter to mark off your support posts. Measure the diagonals of your layout against the house wall to check for square. Move the stakes necessary until the outline is completely square.
To prevent weeds and unwanted foliage from growing up—and possibly through—the decking, spread a sheet of plastic film over the area. Cut the sheeting as necessary to wrap around posts and to allow drainage for rainwater. After the framing is complete you can weigh down the plastic with gravel or stones.
Installing the Ledger Board
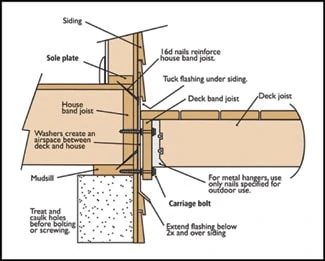
Decks that are attached to a house require a ledger board to make the connection. The lumber for the ledger and all framing members must be pressure-treated for exterior use. The ledger will establish the height of your deck. This is an absolutely critical connection and must be installed properly to ensure the strength and safety of the deck. Your ledger board and the deck’s joists will support the weight of the deck, so use 2-by-8’s or 2-by-10’s depending on the size of the deck you plan to build. Some siding may need to be removed to install the board. The ledger is often bolted directly to the house band joist of the house with a waterproof connection and an air space that prevents moisture build-up. Make sure the ledger is level and attach it by using 1/2-inch diameter lag screws with washers beneath the screw heads. You can create the air space (for drainage) by using washers between the ledger and the house. Through-bolts, nuts and washers are also acceptable fasteners. All hardware and fasteners should be hot-dipped galvanized or stainless steel. When fastening the ledger, drill 1/4-inch pilot holes for the screws spaced every 2 feet. (Some lag screws, such as the RSS line from GRK Fasteners, are self-drilling.) Use a 1-inch spade bit to countersink the screws, which provides a flush surface on which to connect the deck joists.
If you are attaching the ledger to a poured concrete foundation, use expansion bolts. For connection to a block foundation, fill the block cells with concrete or grout and use a rubber mallet to drive lead masonry anchors for 3/8-inch lag screws into predrilled holes. Secure the fasteners with epoxy.
Seal the heads of the ledger screws with silicone caulk. The ledger connection should also be protected with flashing to prevent water intrusion. This is a critical step; the flashing will help prevent water from collecting behind the ledger and leading to rot. And the rot could, in turn, possibly lead to the deck collapsing when the screws pull away from the rotted wood. Check local codes for specific flashing instructions. Generally speaking, you want to tuck the flashing behind the siding to consistently divert runoff away from the house and ledger connection.
Support Framing
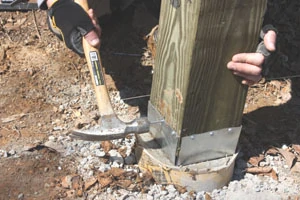
Current code guidelines generally specify that deck posts should be 6-by-6 treated lumber—and specified for ground contact—rather than 4-by-4’s. Deck posts can be supported by concrete pier footings or buried below the frost line and set in concrete. One of the newest and smartest methods of fastening a post is to use the galvanized post anchors from Simpson Strong-Tie, which elevate the bottom of the post about an inch off the surface of the footing to keep it away from standing water.
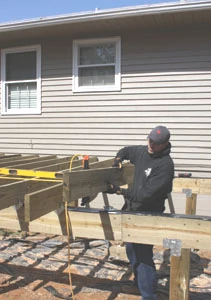
If the deck joists are supported by a beam, the beam should be connected to the support posts with the appropriate metal brackets, or notched into a 6-by-6 post and fastened with lag screws. It is not acceptable for joists or beams to only straddle the sides of the posts with through-bolts. The beam is constructed from two straight boards of the same dimensions—usually 2-by-8 or larger—that are nailed and glued flush and face-to-face to create a single 4-by. Build the beam with lag screws or 10d nails in a staggered pattern every 12 to 16 inches. Make sure any splices in the beam are located over a support post.
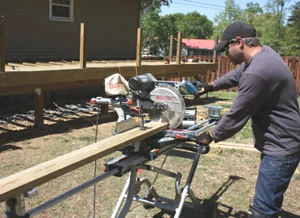
Where deck joists intersect the ledger board they should not be toe-nailed. Connect the joists with hot-dipped galvanized joist hangers and joist-hanger nails. Where deck joists cross the top edge of a beam, they can be attached with galvanized hurricane ties. Use your decking plan to determine joist spacing. Joists spaced 16 inches on center will usually do the trick, but you may need to space them more closely to accommodate some deck-board systems.
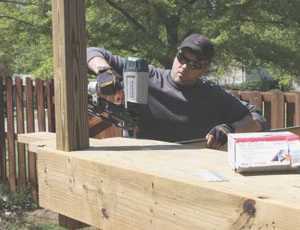
To stabilize movement in a deck frame, you have a few options. One is to install a long diagonal 2-by-4 brace to the underside of the joists. Another is to install perpendicular blocking between the joists, cut from the same size lumber as the deck joists. Another tried and true method is to install diagonal 2-by-4 braces fastened to the support posts and the adjacent framing members.
Decking Decisions
The decking surface can be made from pressure-treated wood, wood-plastic composite decking, PVC decking, cedar, cypress or exotic hardwoods such as ipe. Even aluminum deck systems are available. Each material has different advantages; some offer the genuine wood grain that you’ll only get with a natural product, while other options may offer cool hidden-fastener systems, a prefinished appearance and minimal maintenance requirements. Research your material options carefully, explore the maintenance issues and balance your desire for certain aesthetics with a close eye on your budget—depending on the material, deck boards can vary greatly in cost.
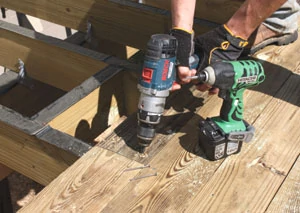
The method of fastening your deck boards will be determined by the product you’ve chosen. The most popular decking material in North America is still pressure-treated lumber. These deck boards are generally installed with the bark side of the wood facing upward to avoiding cupping. We recommend butting treated deck boards together because as the moisture dries from the wood, the boards will shrink and naturally form gaps to allow water drainage. (Depending on moisture content, cedar, cypress and especially hardwood decking may require deliberate spacing for consistent joint sizes.)
Note: A popular method of installing treated decking is to lay the boards diagonally over the framing for some extra decorative flair. You’ll need to make this decision in advance of framing your deck, because the joists of a diagonal decking system should be spaced no greater than 12 inches on center. Parquet patterns or other more elaborate designs may require even further support, such as additional blocking or doubled joists.
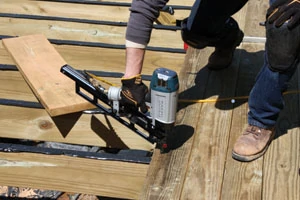
Fasteners for wood should be stainless steel, hot-dipped galvanized or otherwise coated for exterior use. If nailing the boards, the EHT staff recommends using two ring-shank nails per joist, driven through the decking at an angle toward each other for extra holding power. To prevent wood from splitting, use nails with thin shanks and blunt points. And, always pre-drill the grain at the ends of the boards before fastening to avoid splits.

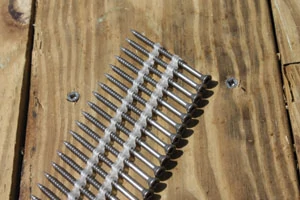
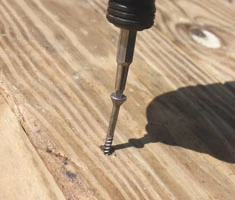
Screws can also be used to fasten decks. One new item that makes deck installation easier is the Scrail Fastener. Scrail is a cross between a screw and a nail. Use a pneumatic nailer to drive the collated Scrail fasteners with high-production speed. However, if you make a mistake then you can easily back out the threaded fastener with a screwdriver—something you can’t do with a ring-shank nail.
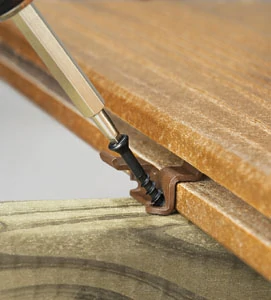
For wood decking as well as plastic and composite options, hidden-fastener systems that install along the edge of the boards are among the hottest new trends in decking. Some composite deck boards even come with a groove in each edge in which to hook a clip or biscuit, which is screwed to the joist then hidden inside the joint when the next board is installed. Other systems employ a tongue-and-groove design that conceals the deck screws beneath the tongue of the mating board.
Stairs, Handrails and Finishing Touches
Stairs on a deck should be connected with galvanized metal hangers specifically designed to connect the stringers to the deck framing. Precut stair stringers, which can spare you a lot of time and calculations, are available at most lumber yards and hardware stores.
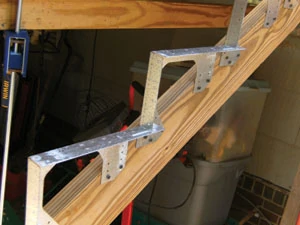
Also available are metal stair brackets for constructing a staircase with minimal marks and cuts. Rather than using notched stringers, the brackets attach to a pair of solid 2-by-6’s using predrilled holes and pre-marked measurements. This creates a mounting surface for the treads and risers, whatever the pitch of the staircase.
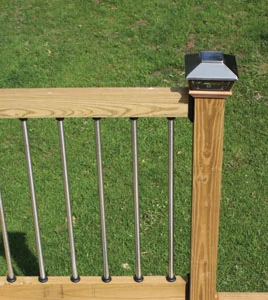
Handrail systems pose another place for potential danger if they aren’t constructed properly. The posts of the handrail should not be nailed to the side of a deck. Nor should the posts be notched where they connect to the deck. At a minimum, 4-by-4 rail posts should be fastened to rim joists with a pair of 1/2-inch-diamater through bolts and washers. An even better practice is to reinforce the post-to-deck connection with metal hardware, such as that manufactured by Simpson Strong-Tie or Deck-Lok. Install the posts plumb and square. The rails and pickets should be built rigidly with no wobble or sway in the construction. Rail height is usually 36 inches high, and the pickets should be spaced no more than 4-inches apart. A variety of manufacturers offer rail kits for decks that ensure code compliance and a sturdy design.
Building your own deck provides an opportunity to give it a personal stamp. In addition to the wide range of building designs, you can dress it up with a combination of complementary paint or stain colors, add artistic deck-board accents or integrated lighting, even construct planter boxes, benches or inset frames that wrap around trees. Ultimately, the finished look is up to the designer, so if you’re designing the deck, have fun with it.


