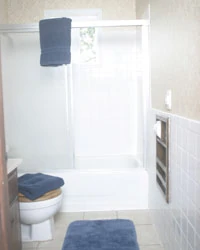
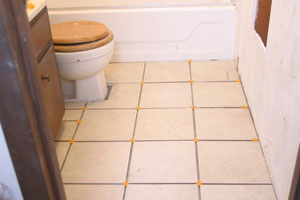
The bathroom shown had the typical problems of a construction about 30 years old. The window was located too low and rotted out from water damage from the shower. It was also an older, inefficient window. The tile around the tub and shower area was in good shape, but needed regrouting and recaulking. An old, inefficient space heater was located in one wall. Replacing the window, regrouting and recaulking the tub, new wallpaper, and replacing the heater with STEP Warmfloor radiant floor heating under ceramic tile made the bathroom more energy efficient as well as more attractive.
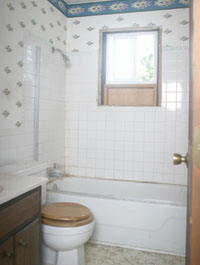
This 30-year-old bathroom had typical problems–old, rotted window, hardened bathtub caulk and an inefficient and dangerous space heater.
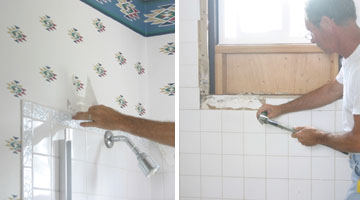
Left: First step was to remove the old wallpaper.
Right: A new window was installed and tile removed from around the old window.
Help from New Materials
First step was to replace the old window. A much more energy-efficient, solid vinyl window was chosen. The new, smaller, side-sliding window was also located higher to avoid water damage from the shower.
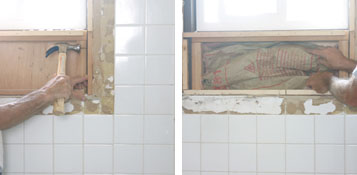
Left: The area below the new window was framed in.
Right: The opening is filled with insulation.

New drywall is installed over the insulation.
Framing in the window was a basic carpentry job, although it did leave an opening on the bottom on both the outside and inside walls. In this case, however, the house was also being resided, so the outside finish work was fairly simple. Sheathing was added, then the house resided, including the area below the new-construction style window. The opening below the window on the inside was covered with drywall. The bathroom had damaged drywall, and new drywall was also added in these areas.
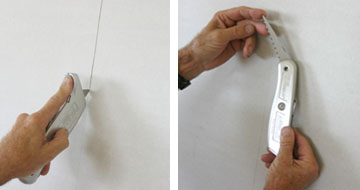
Left: C.H. Hanson Speedrocker is a dual-purpose drywall tool, with a blade for cutting.
Right: A fold-out saw cuts out electrical box holes.
Several new products were used in the drywall installation. C.H. Hanson’s Speedrocker allows you to carry three drywall tools in one. The utility knife is not only comfortable to use, but has a slot in the handle. Insert the end of a tape measure in the slot and hold the tape measure against the drywall edge at the width needed to make a measured cut. The tool also has a jab saw in the handle—merely pull out the saw to make cutouts for electrical boxes. One side of the handle also has a rasp that can be used to smooth up cuts. A Blind Mark magnetic marking device was used to mark the cutouts for electrical boxes.

Blind Mark uses magnets inside electrical boxes and on drywall to quickly and precisely mark for openings.

Self-adhesive E-Z Tape joint tape makes it easy to cover the joints.
The joints of the drywall were taped using E-Z Stick drywall tape, a definite advance in joint taping. Old-fashioned tape requires applying a coat of joint compound, then pressing the tape in place and applying joint compound over the tape. Mesh, adhesive tape is available, but it requires more joint compound and effort in covering. E-Z Stick tape is self-adhesive. Cut off a strip of Finishing Tape sufficient to cover the drywall seam. Dip the strip in water just long enough to wet both sides of the tape, and then quickly remove it from the water. Place the wet strip over the drywall seam. Smooth the wet tape in place with a trowel or 6-inch drywall knife to remove excess water. Allow 10 to 15 minutes for the tape to dry before applying drywall compound. Wet the tape with a sponge if you need to reposition it, although this can cause some damage to the drywall surface.
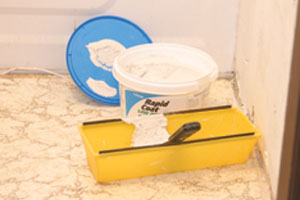
LaFarge joint compound creates less airborne dust during the sanding process.
Going “green” with the drywall, we used LaFarge Rapid Coat Low Dust all-purpose joint compound to seal the joints and fill over drywall fasteners. This product creates less airborne dust during the sanding process, so it’s not only less messy, but easier on the applicator. Also, I found it to be extremely adhesive and easier to work with than some other drywall joint compounds.

The window trim is painted and then installed with an air nailer.

The Bosch cordless miter saw makes it easy to do job-site chores such as cutting window trim.
Custom Magazine Rack
The opening in the wall for the old space heater was filled in with a shop-made toilet-paper/magazine rack. The rack was constructed of pine 1-by-12’s. First step was to build the frame to fit between the wall studs. A 1/4-inch plywood back was added, fastening all together with Titebond II glue and staples driven with an air fastener. A lip was created around the outside edge with decorative routed edges on the lip strips. The lip strips were fastened in place with finish nails, their heads set and the holes filled with wood filler. An inexpensive toilet paper holder was purchased, and the support rod used in the rack. The 3/8-inch deep holes were bored in one side of the rack and in a second support piece, using a portable electric drill and forstner bit. The horizontal divider was installed using finish nails through the sides into the ends of the divider. Then the vertical support piece fastened in place, again with finish nails. Finally, the magazine support strips were fastened to the outside lip pieces, again using No. 6 finish nails with their heads set below the surface and filled with wood putty.
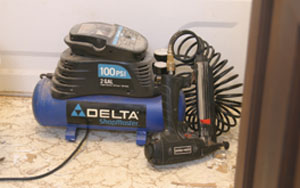
A mini compressor is easy to carry to the job site for driving air fasteners.

Tile to match old tile is installed around the window.

The new tile is then grouted.
Incidentally, if you desire to stain and finish the rack, as was done on the rack shown, it’s easier to apply finish before the interior support strips are installed. Cut the support strips, and apply finish to them as well before installing. The rack is held in place by anchoring into the studs with self-tapping wood screws.
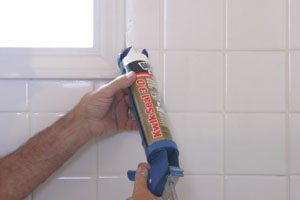
DAP KWIK Seal 3.0 Kitchen and Bath Adhesive is applied around the window, the old caulk removed from the tub and tile, and then recaulked.
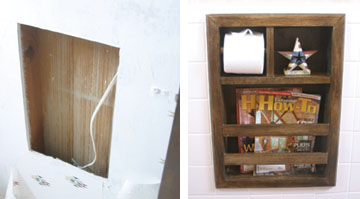
Left: Shown is the opening from the old space heater.
Right: A shop-built toilet-paper holder/magazine rack was made and installed.
With the area below the old window sealed, new tile was added to match the existing tile. MAPEI Type I adhesive adhered the tile in place. The area surrounding the old space heater was also tiled to match the existing tile. The remaining old wallpaper was removed and new wallpaper hung.
New wallpaper was added and a thermostat for STEP Warmfloor radiant heating element installed.
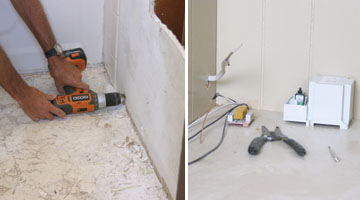
Left: The hole was bored through the wall into the adjoing closet for running the heat element wires to a transformer.
Right: The transformer was located in the closet on a shelf.
Caulk RX
The next problem to address was the old bathtub caulk. Discolored, cracked and peeling in several places, it was completely removed using a sharp utility knife to cut it away from the wall tile and tub. Then a flat chisel was used to pry it off. The area was cleaned thoroughly, and then recaulked using another “green” product, DAP Kwik Seal 3.0 Advanced Kitchen and Bath Adhesive Caulk with Kwik Dry technology. This new sealant allows it to be exposed to water and moisture after only three hours without washing out. This means you can caulk and shower in three hours, or even caulk and paint in three hours—no more waiting around. Another benefit is the addition of Microban Antimicrobial Product Protection that fights the growth of bacteria, mold and mildew that causes odors, stains and degradation of the caulk. Also, the product is paintable and has low odor and low VOC content for improved indoor air quality. I found it extremely easy to apply, with great adhesion.

The corners are snipped off the heating elements to expose wire braids. The element wire is then crimped to the braids using a crimper tool supplied with the kit.
Warm Feet
One of the major improvements was installation of STEP Warmfloor radiant floor heating under the ceramic floor tile. Not only more efficient than the old space heater, the radiant flooring is also more user friendly, safer and eliminates dust and other particles. STEP Warmfloor radiant floor heating is available in easy-to-install kits, with everything you need for installation, including: the heating elements, a 24-volt transformer, terminal board, connector kit and the connecting wires needed. On small rooms, you may wish to install only an off-on switch, but a thermostat is the best choice. Residential kits can be used for all flooring applications (including tile, stone, resilient hardwood, carpet and so forth). The company makes it extremely easy to design and lay out your floor. Their website has a work sheet, which you fill out with the details of the room, with information as to size of the room, number of windows, type of construction, type of floor support, type of finished floor and the amount of thermal insulation available. Also included is a squared drawing so you can sketch in room dimensions. Your kit includes a flooring layout diagram as well as full instructions.
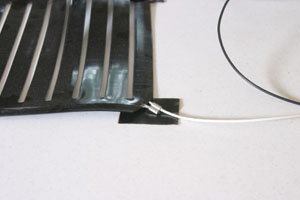
The crimps are then protected with supplied rubber tape.
It’s important to make sure the installation conforms to local building codes, ordinances and trade practices. First step is to design the layout and calculate the materials needed for the job. Do not place heating elements under base cabinets, fixtures and appliances. Minimum distance between elements and from plumbing fixtures is 2 inches. Performance of the kits depends on the amount of thermal insulation under the elements. It is required to insulate the floor beneath the element or between the floor joists.
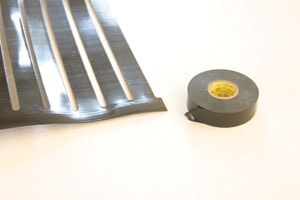
Electrical tape is used on the exposed ends of the element braids.
Once the layout is designed, use scissors to cut the element into the sizes needed. Then determine the extension wire connection locations. They can be connected to the element on the floor, up the wall, under the baseboard, or below the subfloor in a basement, ceiling or crawlspace. The extension wires run from the elements to terminal boards and then to a transformer. The transformer must be installed in a well-ventilated and accessible area and wired in accordance with the National Electrical Code. In this case the transformer and terminal board was located in a closet adjoining the bathroom. The wiring for the old space heater was connected to a thermostat in the bath and the wiring was run through the wall to the transformer.
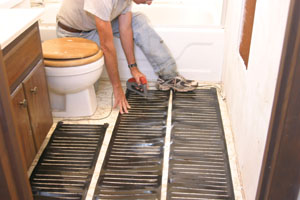
The elements are positioned in place, then stapled to the subfloor.
With the elements and wire connection locations determined, expose the two longitudinal wires by cutting the plastic on each side of the longitudinal bus braids. Or, make a score in the plastic front and back with a knife. Bend the element where the cut is made and pull off the corners to remove the surplus plastic. Make sure you do not cut or damage the braided wire. The extension wires are connected to the bus braid with the tinned copper connectors using a crimping tool supplied with the kit. Make sure the wires and braids are securely fastened. Give a light tug after crimping to make sure none are loose. I discovered a loose crimp just as I was about to embed the element. Sealant tape is then cut and folded and pressed together to overlap the element corner, connector and wire splice to form a flat and smooth splice.

The elements are then embedded in MAPEI Dust-Free Ultraflex 2 tile mortar.
Stretch each element firmly in position and attach to the subfloor with staples or tape, or spot with hot glue. Do not puncture the bus braids on each side of the element. Do not use adhesive to glue down the element (other than a latex modified mortar). Do not place the elements in direct contact with any conductive material or in indirect contact through metal fasteners.
Cement board is installed, fastening on marked lines to prevent fastening through the braids or extension wires of the elements.
Connect each element in parallel to the terminal boards with the extension wires, and the bus board to the transformer. The heating elements and wiring must be measured and checked by a certified electrician before being covered.
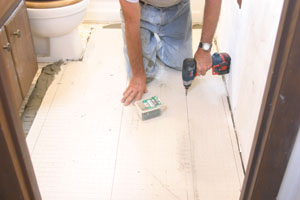
The ceramic tile is applied and grouted over the heating mats.
The last step is to cover with your chosen flooring. Level the floor using the proper mortar, underlayment or cement backer boards. Do not place a conductive material or aggressive adhesive in direct contact with the heating elements. In the case shown, the elements were embedded in MAPEI Dust Free Ultraflex 2 tile mortar with polymer. Cement board was applied, first marking fastener location lines so no fasteners would penetrate the wiring. The tile mortar was then applied to the cement board and ceramic floor tile installed and grouted.
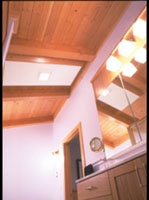
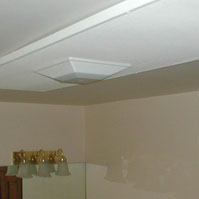
Easy-To-Install Bathroom Heat and Lighting
Upgrading a bathroom? Consider the Enerjoy Bathroom Comfort Center, which focuses gentle sunlike radiant warmth on people and objects. Each Comfort Center contains all the components necessary to provide and control bathroom heat, room light, night light, exhaust and ventilation.
Much like a microwave oven, the ceiling-mounted Enerjoy Heat modules safely transfer radiant energy to the cooler floor, walls, windows and people, which reradiate heat that warms the air. Centered in the multiple-sized Heat module is the combination fan, light and night-light. The single, compact Comfort Center can easily be installed in new or existing bathrooms in all types of buildings. The Comfort Center provides an economical, quiet, easy-to-control heating and ventilating system for total bathroom comfort.
The design allows for economical use of ceiling space, as well as wall space for the controls. Plus, the Comfort Center is as easy to install as electric lighting, with the Heat module covering whatever ceiling alteration occurs during new or retrofit installation.